Knowledge Base Article
Add Notebooks and Notes
A notebook is a collection of notes about one subject. What you keep in them is up to you and your team: a notebook per department holding that department's resources and information, one per recurring meeting, one per project, or a personal one for your own reminders.
For a shorter introduction, see How to Use Notebooks for Personal and Team Notes. This article is the full walkthrough.
Create a notebook
- Choose Workflow & Productivity > Notebooks from the main menu. Your notebooks page opens on Team Shared Notebooks. Use the switch at the top of the page to move between that and My Personal Notebooks, which only you can see.
- Click New Notebook.
- Argenta opens the Notebook Workspace. Go to Notebook Details and fill it in.
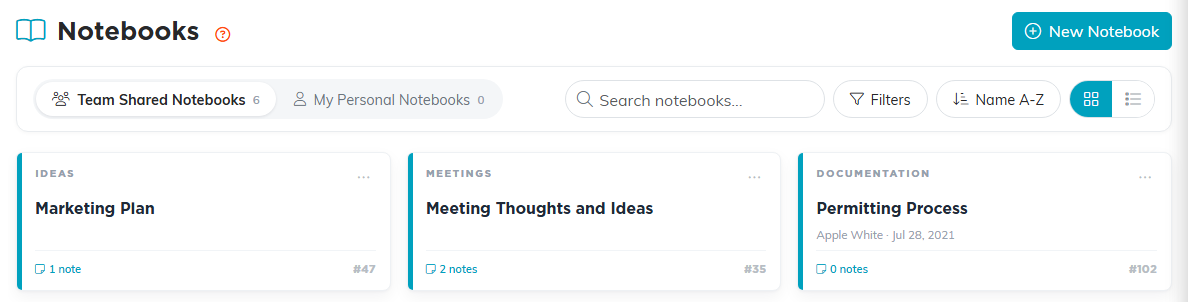
Team Shared Notebooks is shared. My Personal Notebooks is only yours.
The workspace has five pages: Notes, Notebook Details, Checklists, Notebook Files, and Record Permissions. Notes comes first, because that is what you will use most.

The five pages of the notebook workspace.
Notebook Details
- Notebook Name. Required. Try to save without one and Argenta tells you "Notebook Name is required."
- Category. Chosen from your own classification codes. Use the add icon on the field to create a new category on the spot.
- Notebook Color. Sets the color the notebook shows in your list, which is the quickest way to tell a dozen notebooks apart at a glance.
- Chapter, Division, Department, District, and Precinct. Use these when the notebook belongs to one part of your organization, or to limit who can see it.
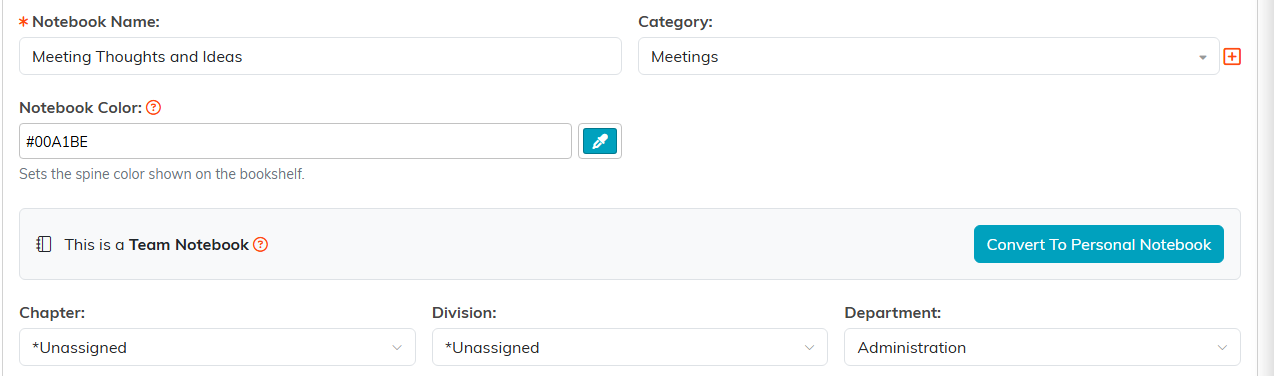
Notebook Name is the only field you have to fill in.
The two switches at the top are Set As View Only, which lets the team read the notebook without changing it, and Lock This Record, which keeps them out entirely. The person who created it, master admins, and anyone named on Record Permissions keep their access either way.

The two switches sit at the top of Notebook Details.
Save with Save All Changes & Continue or Save All Changes & Exit. There is also a save icon at the top of the workspace.

The save row at the foot of Notebook Details.
Add notes
- Go to the Notes page and click Add A New Note.
- Enter a Note Title. This one is required.
- Set a Note Type and Note Category if you want to group your notes. This Note Is In (Notebook) shows which notebook the note belongs to, and lets you move it to another one.
- Write the note in the editor. It is a full editor, so you can format text, add images, insert links, and build tables rather than typing everything flat. Hover over any icon and it tells you what it does.
- Attach files directly to the note if you have supporting documents.
- Click Save All Changes to keep going, or Save All Changes & Exit to go back to the notes list.
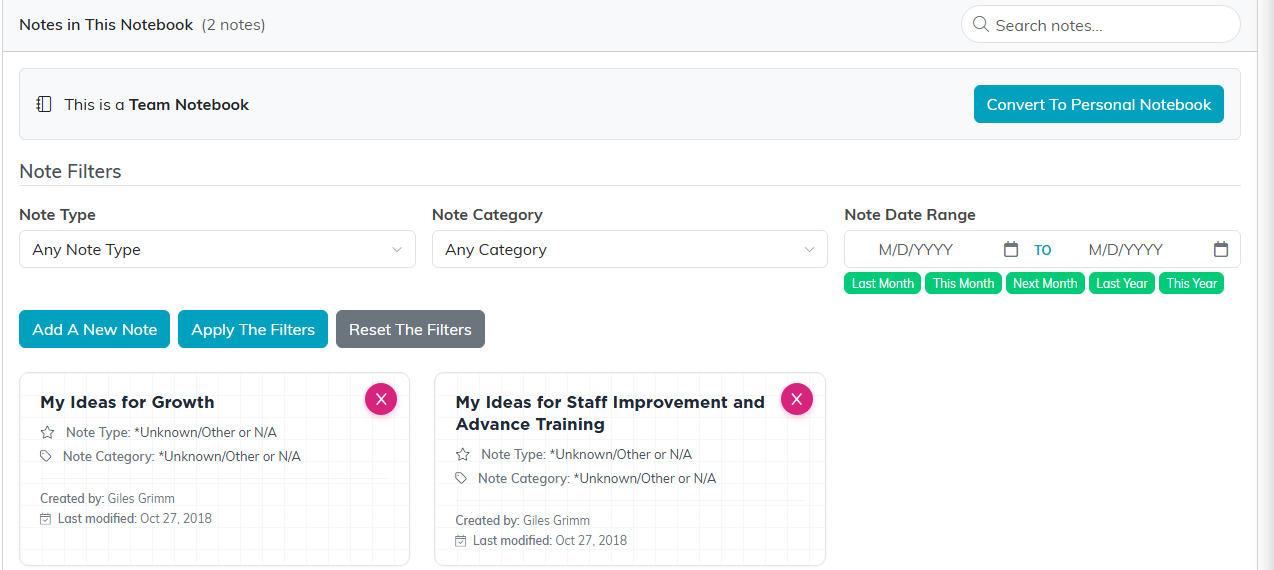
Add A New Note sits with the filters above your notes.
Repeat for as many notes as the notebook needs. Back on the Notes page you can filter by note type, note category, or a date range, and search within the notebook, which is what keeps a long-running notebook usable.
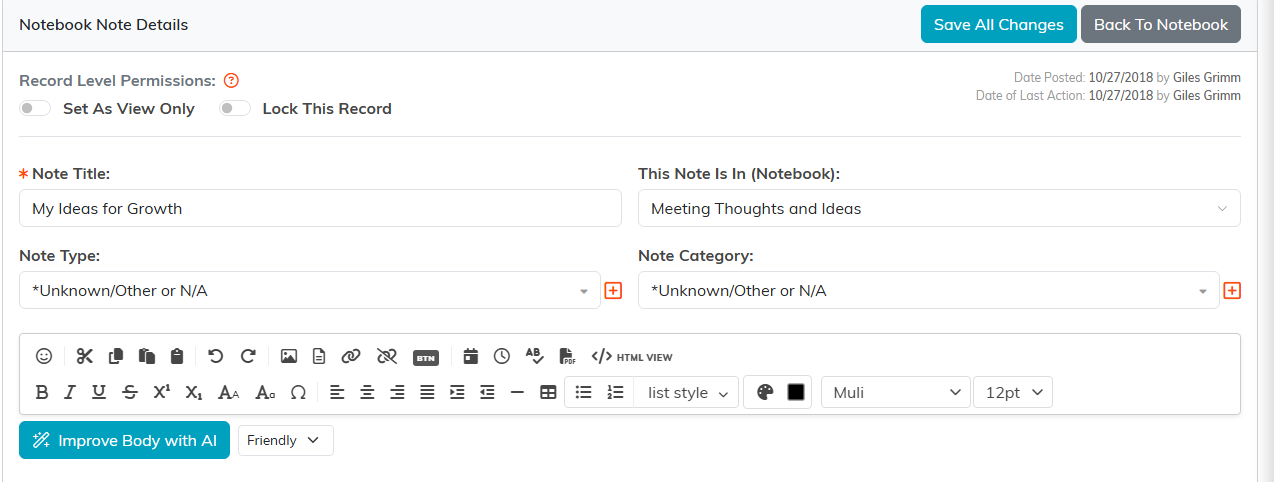
Note Title is required. The editor handles the rest.
Checklists
A notebook can carry checklists as well as notes, which is useful when a set of meeting notes turns into things somebody has to do.
- Go to Checklists and click Add New. A row opens with a name box.
- Name the checklist and click the save icon on that row.
- Click the open icon to go into it, then click Add New for each item, saving each one as you go.
- Click Back To Lists to return to the notebook's checklists.
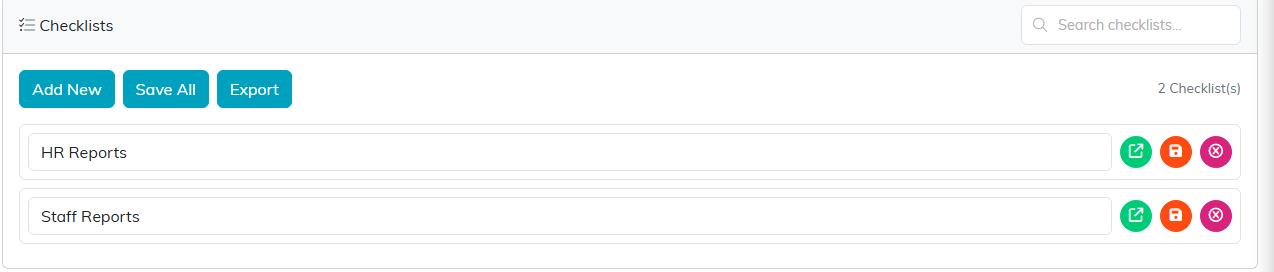
Add New opens a row with a name box.
Toggle All ticks or clears the whole checklist at once, and Copy List duplicates a checklist with its items, so a checklist you use every month only has to be built once. Full details in Add Checklists.
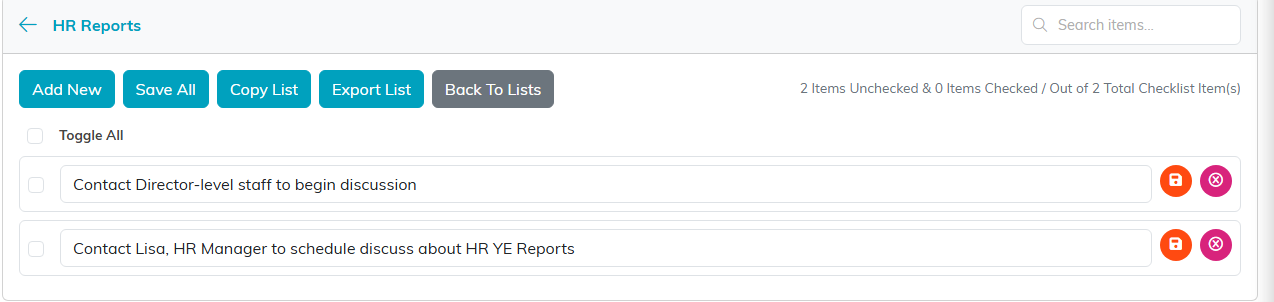
Inside a checklist you get Toggle All, Copy List, and Back To Lists.
Files and permissions
- Notebook Files holds files for the notebook as a whole, as opposed to files attached to one note. Save the notebook first. See Add Related Files.
- Record Permissions has a View Only Access panel and a Locked Record Access panel. Start typing a user's name in the Add User box, choose them, and click Add. People under View Only Access can still edit a view-only notebook; people under Locked Record Access can still open a locked one.
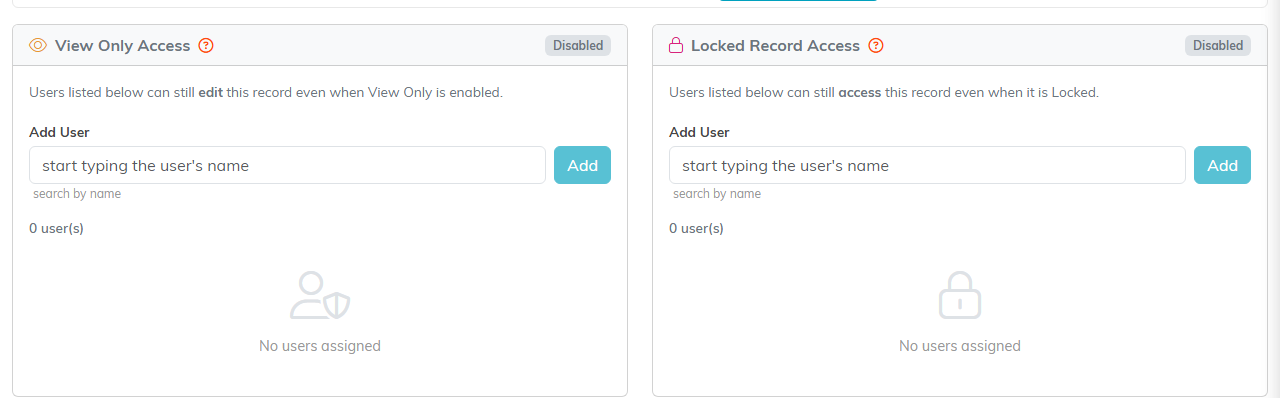
Name the people who keep access to a view-only or locked notebook.
For notes that belong to one donor, event, or task rather than to a subject, use the notes area on that record instead. See Add A Note to the Notes Section.
