Knowledge Base Article
Overview, Working with Campaigns
A campaign is any effort your organization makes toward one goal: raising money, filling an event, recruiting volunteers, or spreading the word. Because campaigns connect to donations, sales, leads, emails, expenses, and events, the Campaign Workspace ends up being the one screen that tells you whether the effort worked. This article is a tour of all twelve tabs.
To get there, go to Fundraising > Fundraising Campaigns (also under Marketing & Engagement > Campaigns), select a campaign, and click the green open icon. To create one first, see Add Campaigns.

All twelve tabs sit in the workspace menu. The Public Forms button on the right is where both public links live.
Your two public links
At the top of the workspace, the public forms menu gives you both links for this campaign: Open Public Campaign Donation Form / Copy Campaign Donation Form Link, and Open Public Campaign Sales Form / Copy Campaign Sales Form Link. Use the copy option when you are putting the link in an email, a post, or on your website. The link is what ties a gift or a purchase back to this campaign, so anything raised through it reports here automatically.
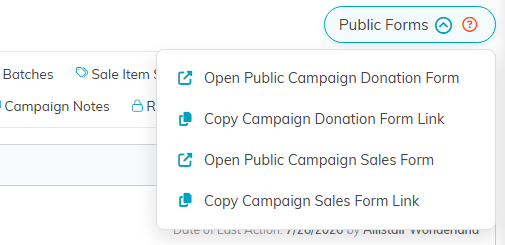
Open takes you to the form as a visitor sees it. Copy puts the link on your clipboard for an email or a post.
1. Campaign Details
The core record: status, dates, owner, title, fund, UTM code, type, category, final outcome, and your chapter, division, and department. Two switches at the top set record-level permissions. Full field-by-field detail is in View and/or Update A Campaign.
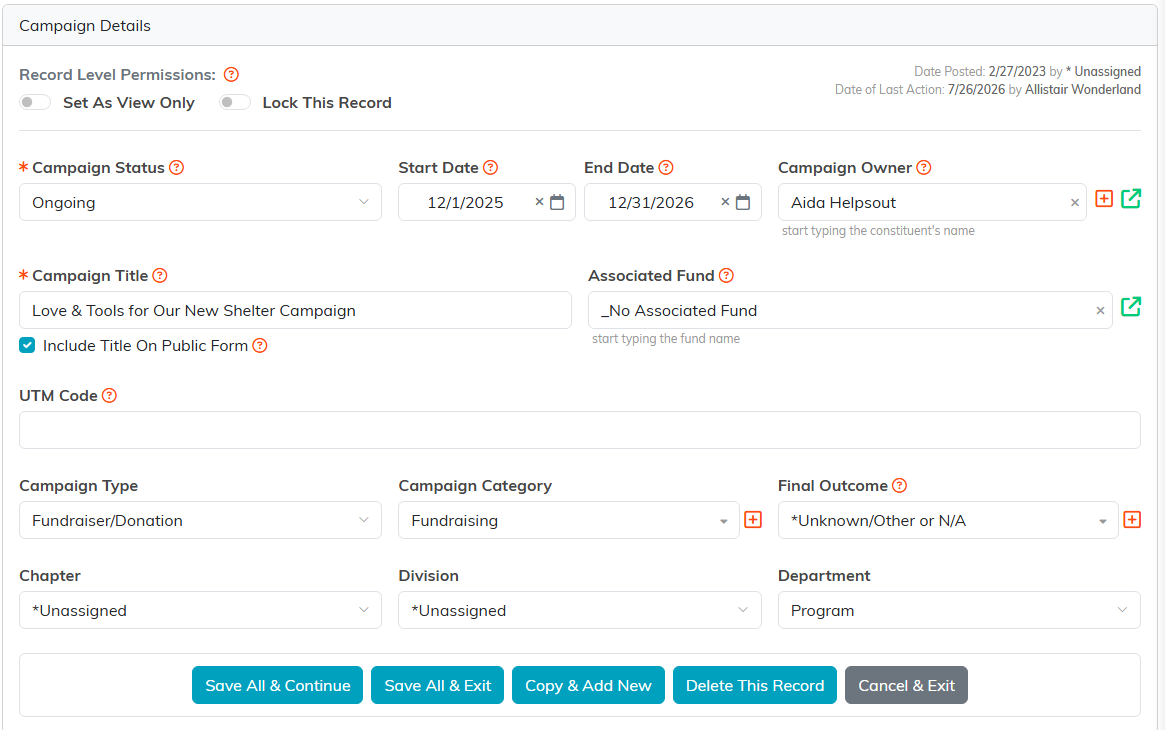
Status and title are the only required fields. Everything else can be filled in as you go.
2. Connections
Where you tie the campaign to the rest of your system. Associated Auction, Associated Fund, and Associated Project are single lookups that save the moment you pick one (you will see a green Saved check). Below them, panels let you attach as many Associated Events, Associated Programs, and Associated Tasks as you need. Removing a connection here never deletes the record itself.
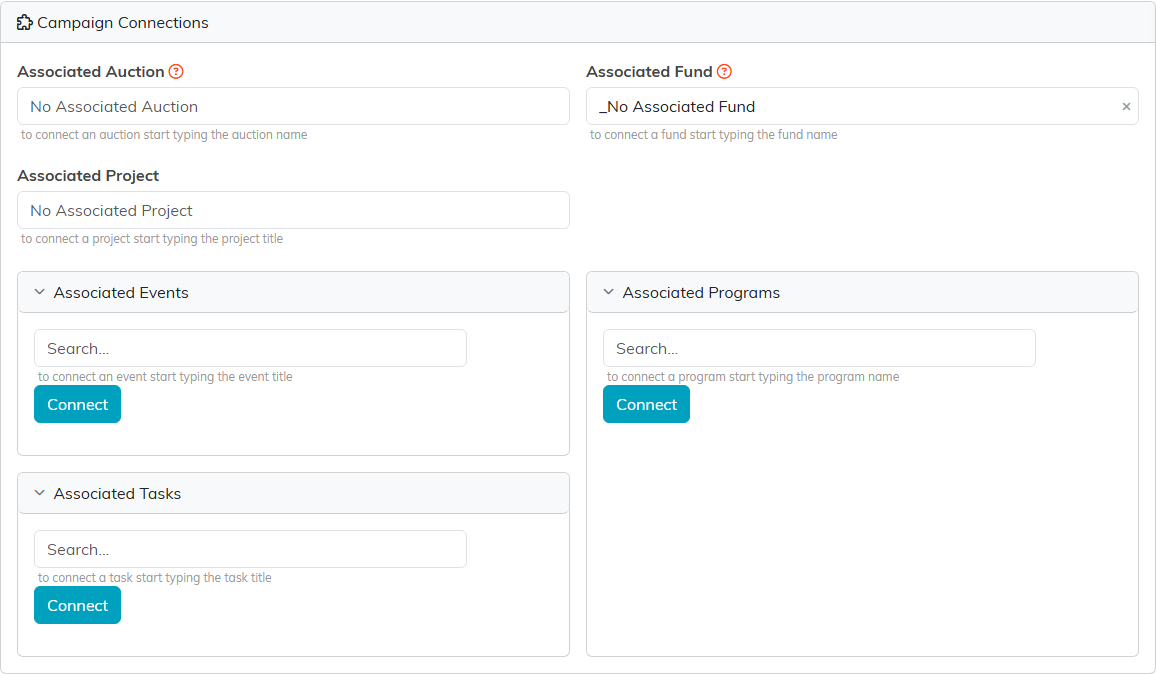
The three lookups at the top save as soon as you pick something, so watch for the green Saved check rather than hunting for a save button.
3. Public Form Design
Controls how both public forms look, and includes a share card with a downloadable QR code for each one.
- Public Sales Form (On or Off). The master switch for the sales form.
- Banner Image. Upload one and click Save As Banner Image. It runs across both the donation and the sales form. Remove Banner Image takes it back off.
- Form Settings. A Form Title (leave it blank and no title shows), colors for the sales form headline, icons, and buttons, and switches for which fields the sales form asks for: Mailing Address, City/State/Zip, Phone Number(s). Show Progress on Public Form(s) puts your fundraising thermometer in front of donors.
- Fundraising Leaderboard. Turn it on and donors can tag the company or team they are giving under, and a public leaderboard ranks companies by total raised. You can also let visitors click a company to see its individual donors. Donors can still give anonymously, and the leaderboard only ever shows donation totals.
- Form Content. The rich text block visitors read on the form. Write the ask here.
Click Save All Changes when you are done.
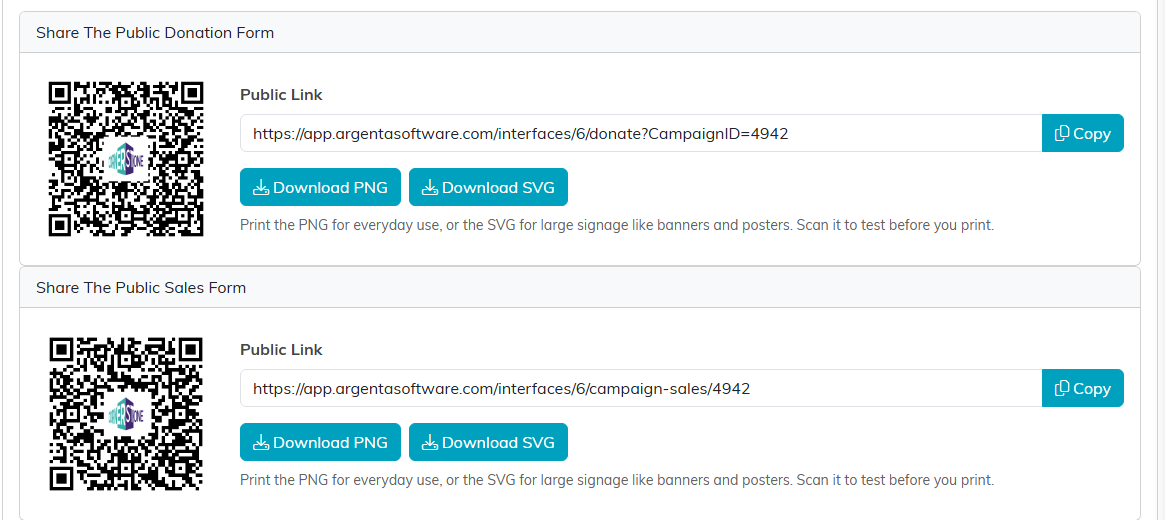
One share card per form. Take the SVG for anything printed large, like a banner, and scan it yourself before it goes to print.
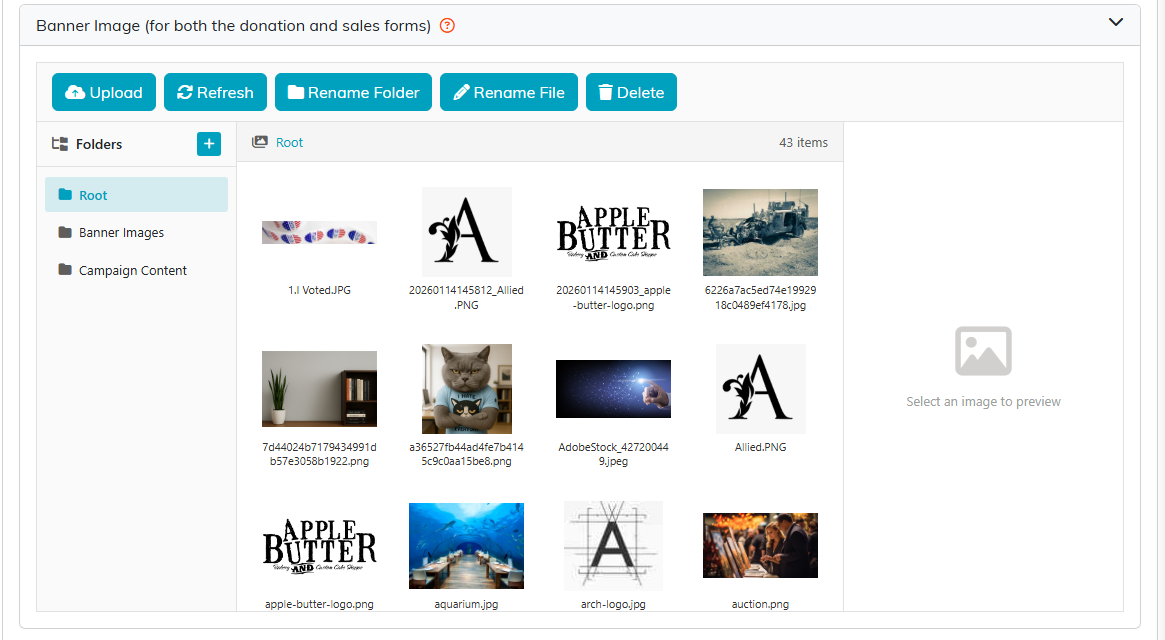
The banner runs across both forms. This is your own file library, so anything you have already uploaded is here to reuse.
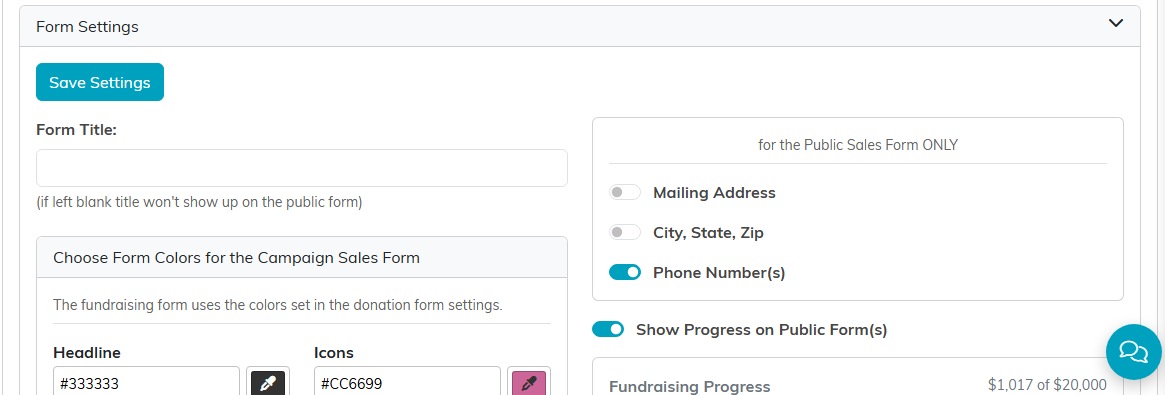
The field switches on the right apply to the sales form only. Show Progress is what puts the fundraising thermometer in front of donors.
4. Email Batches
Every email sent for this campaign, with the template name, subject, who sent it, and when. Click a batch's open icon for its delivery detail. Pick A Template & Send Email takes you to your templates to send another one, and Argenta Mail Room jumps to the Mail Room. See Sending Emails Related To Campaigns and Working with Email Batches.
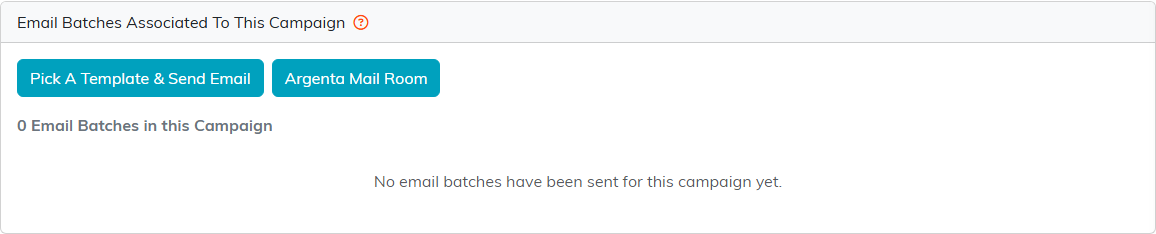
Empty until you send something for this campaign. Both buttons take you off to the Mail Room to do that.
5. Sale Item Settings
The things people can buy through this campaign: tickets, t-shirts, raffle entries, whatever you are selling. Click Add A New Item, then set the item name, description, price, tax deductible amount, and the start and end sales dates. Limit The Amount Available plus Max. Available caps inventory, and Display Order on Form controls where it sits on the public form. Each item shows its current total sold and current sales as they come in. Two switches at the top turn the public sales form on or off and let buyers skip online payment and mail a check instead.
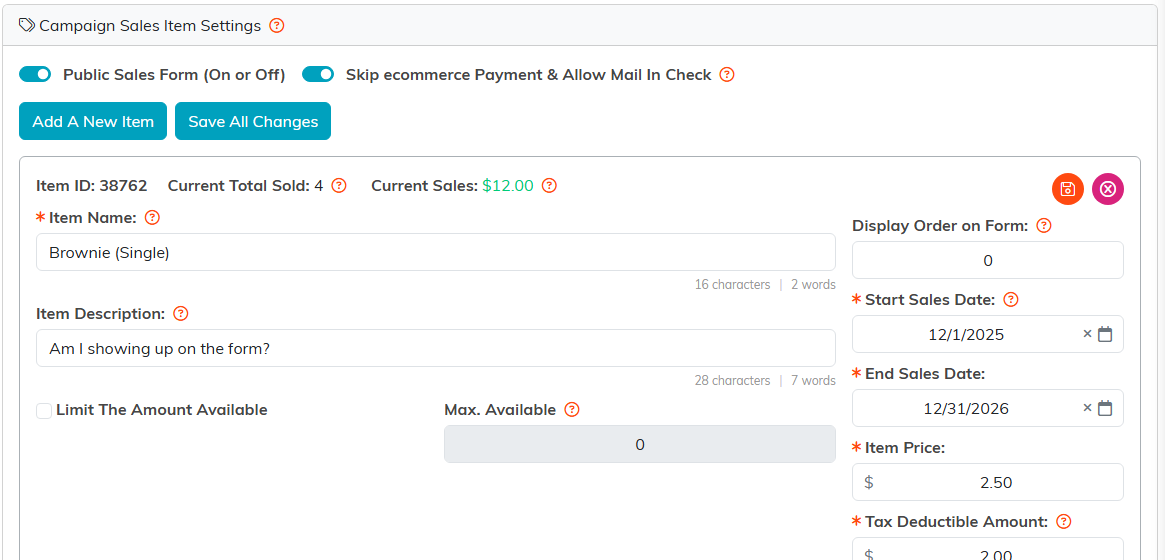
Each item carries its own running total sold and current sales, so you can see what is moving without leaving the tab.
6. Campaign Sales
Every sale recorded against this campaign, searchable by ID, name, or email. Add New records one by hand for an offline sale, and Itemized Sales Report breaks the totals out by item. You can export the list to CSV.
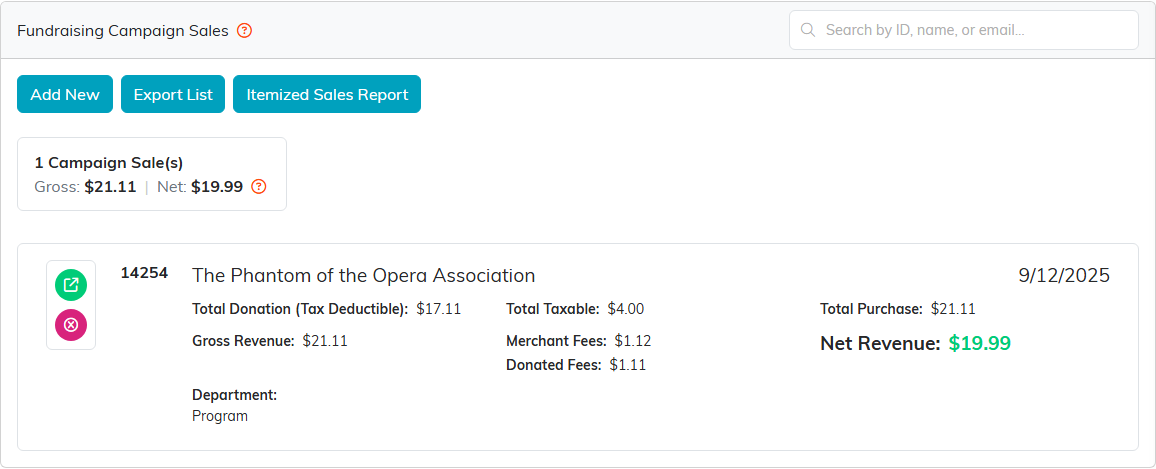
Add New is for a sale you took offline, so cash and checks still land against the campaign.
7. Analytics & Metrics
Seven screens down the left side. Refresh reloads the numbers, and admins can Export CSV.
- Fundraising Results. Campaign Budget, Projected Revenue, Gross Revenue, Total Expenses, Net Revenue, and a fundraising progress bar. These come from Budget & Financials, so fill that in first or this screen sits at zero.
- Sales Results. Leads Acquired, Leads Converted, Cost Per Lead, Cost Per Conversion, and Total Spend.
- Campaign Response. You type these in: Total Targeted, Response Projected, Total Response. Click Save Changes.
- Email Marketing. Total Emails Sent, Emails Opened, Emails Not Opened, Bounced Emails, Unsubscribes, and Spam Reports, pulled straight from the batches you sent through Argenta, plus a per-batch breakdown so you can see which subject line did best. Three fields above it (link clicks, positive responses, negative responses) are yours to track by hand.
- Social Media, Pay Per Click, and Sourcing Results. Nothing appears until you log a result set. Click Add New, pick the source, enter the numbers, and click Add This Result Set. The totals update as you add sets, and you can edit or delete any set later.
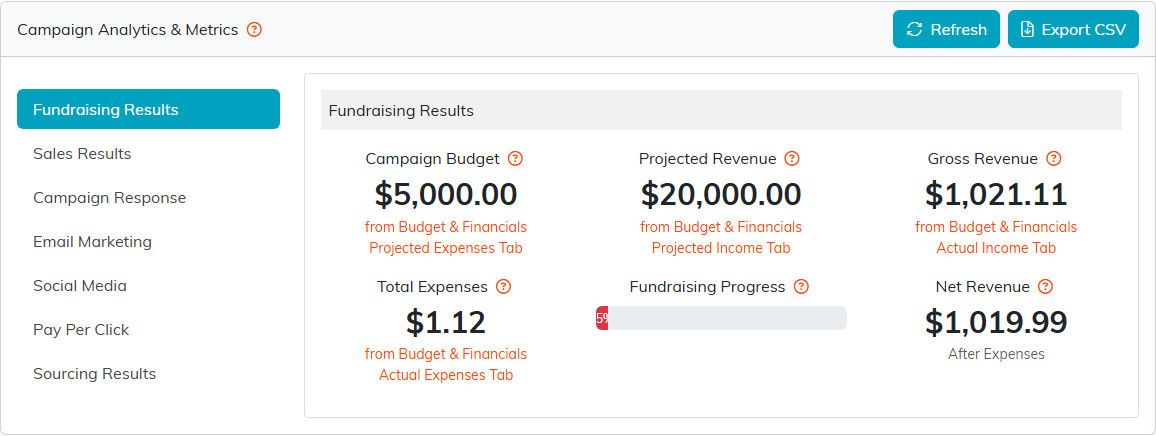
The orange notes under each figure tell you which tab it came from, so a zero usually means that tab is still empty.
8. Campaign Acquisition
Who and what this campaign brought in, as a total plus a mix bar and eight cards: Leads Acquired, Leads Converted, Clients/Customers, Donors, Material Donations, Members, Pledges, and Volunteers. Click any card to drill into the actual records. If someone is missing, open their record and associate them with this campaign.
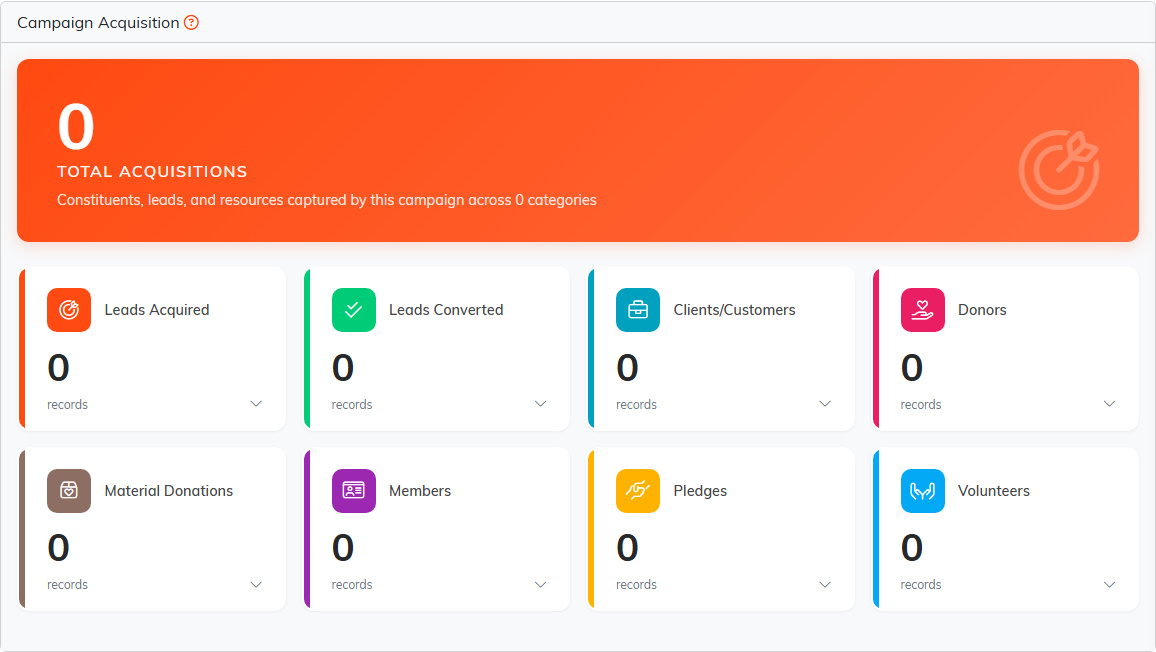
Every card is clickable and drills into the actual records behind the number.
9. Budget & Financials
Four cards across the top, each opening its own screen.
- Projected Expenses. What you expect to spend. Set your Target Budget, then use Add New to enter a cost, expense name, and description. Save All commits your edits.
- Actual Expenses. Read-only. Expenses show up here once they are coded to this campaign.
- Projected Income. What you expect to bring in. Add New takes an amount, income source, and description.
- Actual Income. Donations, invoices, payments, and ticket sales tied to this campaign, collected automatically.
The Financial Summary puts projected against actual and totals your net income, and Print to PDF gives you a copy to share.
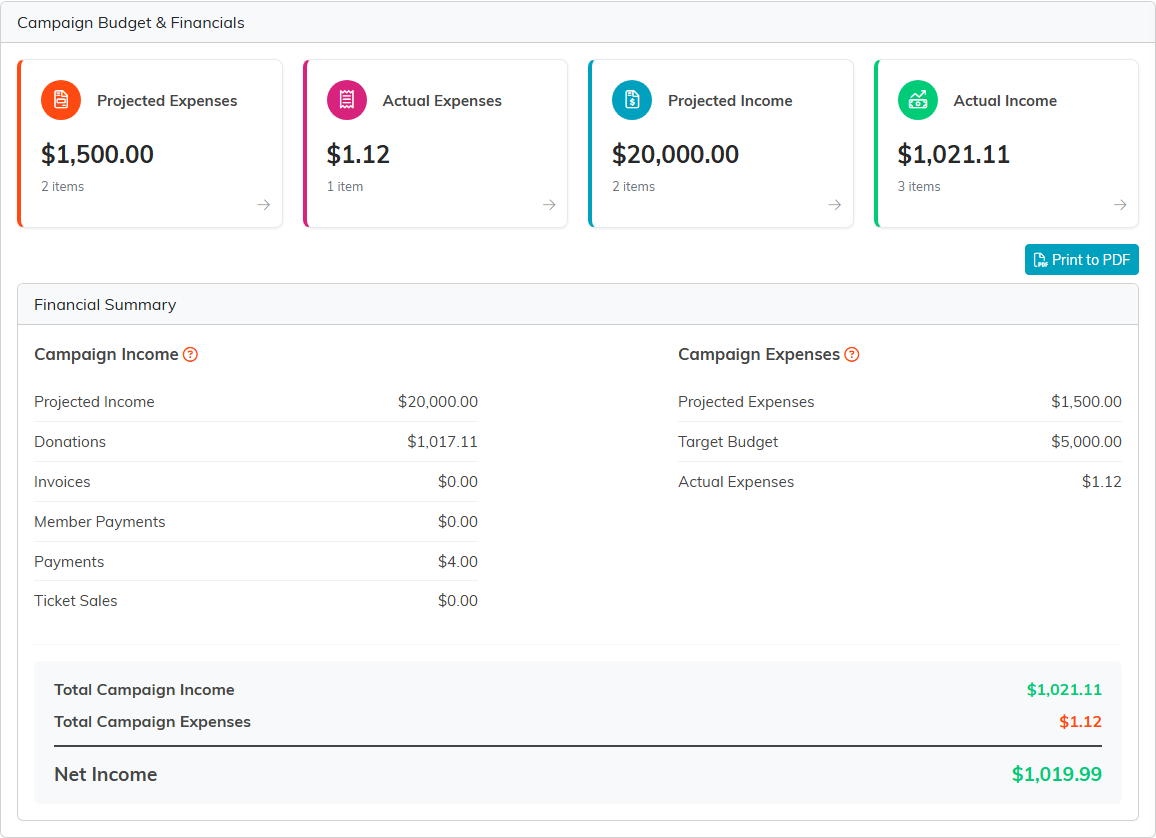
Projected is what you type in, actual is collected for you. The summary is the one to print when someone asks how the campaign did.
10. Campaign Files
Attach anything the campaign needs kept with it: the flier, the sponsor deck, the print proof. See Add Related Files.
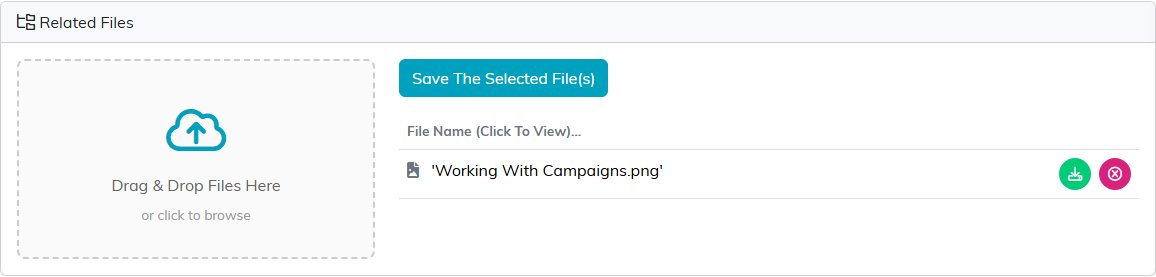
Keep the flier and the print proof here and they stay with the campaign.
11. Campaign Notes
Notes on this campaign, so the context lives with the record instead of in someone's inbox. See Add A Note to the Notes Section.

Notes are dated and carry your name, so the campaign keeps its own history.
12. Record Permissions
When Campaign Details has the record set to view only or locked, this is where you name the exceptions. View Only Access lists the people who can still edit it, Locked Record Access lists the people who can still open it. Start typing a name in the Add User box, pick the person, and click Add. The delete icon beside a name takes the access away.
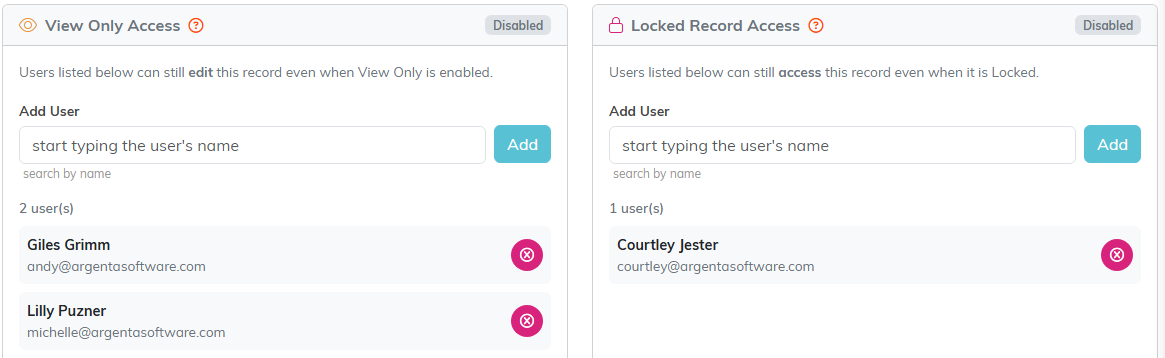
These only matter once one of the switches on Campaign Details is on.
Going live
Set the status on Campaign Details to In Progress or Ongoing, then send people to the campaign's own public link. A gift made through that link creates the constituent and donor records if they are new, posts to your general ledger, and shows up on this campaign's Budget & Financials without you touching anything.
