Knowledge Base Article
Add Mailing Lists
A mailing list is a group of constituents you build for email, text, or postal outreach. You can create one in two ways: from a filtered relationship grid, or directly in the Mail Room.
1. Create a List from a Relationship Grid (for example, Donors)
Every relationship grid (Donors, Volunteers, Members, and so on) can be filtered down to the records you want, which is the quickest way to turn a group of constituents into a list.
- Open the grid you want to pull from, for example Constituents > Donors from the left menu.
- Filter the grid to the constituents you want (for example, a range of Donor Levels).
- Select the records: check the ones you want, or use the checkbox at the top of the grid to select them all.
- From the bulk actions menu, choose Create A New Mailroom List With Selected Records and run it. (To add these people to a list you already have, choose Add Selected Records To An Existing Mailroom List instead.)
- In the Add A New Mail Room List window, turn on the list type(s) you want, Email, Text (SMS), or Postal Mail, enter a Mail List Title, and click Add This List.
Your selected constituents are added to the new list.
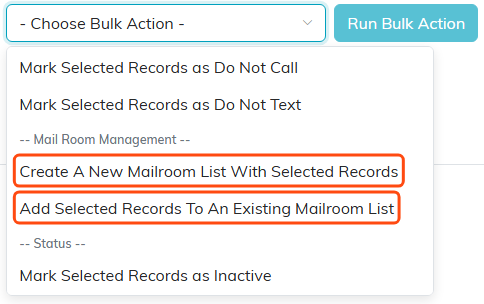
Both routes from a grid live under Mail Room Management.
2. Create a List Directly in the Mail Room
You can also build a list by hand and add people to it one at a time.
- In the left menu, open the Mail Room, then click Manage Mailing Lists.
- Click Add A New List.
- In the Add A New Mail Room List window, turn on the list type(s) you want (Email, Text (SMS), or Postal Mail), enter a Mail List Title, and click Add This List.
- Your new list starts out empty. Find it in Manage Mailing Lists and click the green open icon to go to its List Members page, then search for and add the constituents you want. Members are saved as you add them.
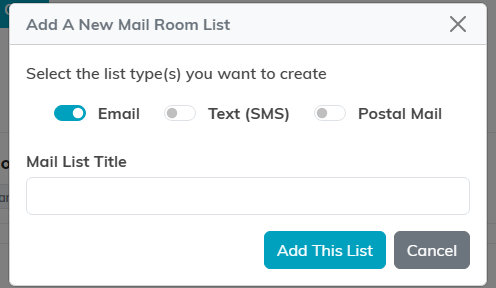
The same window either route brings up.
Turning a List into a Smart List
Any list can become a Smart List, which fills and keeps itself up to date from a rule instead of a fixed set of people. In Manage Mailing Lists, use the wand icon on a list and choose Make It A Smart List. A regular list stays exactly as you built it until you change it.
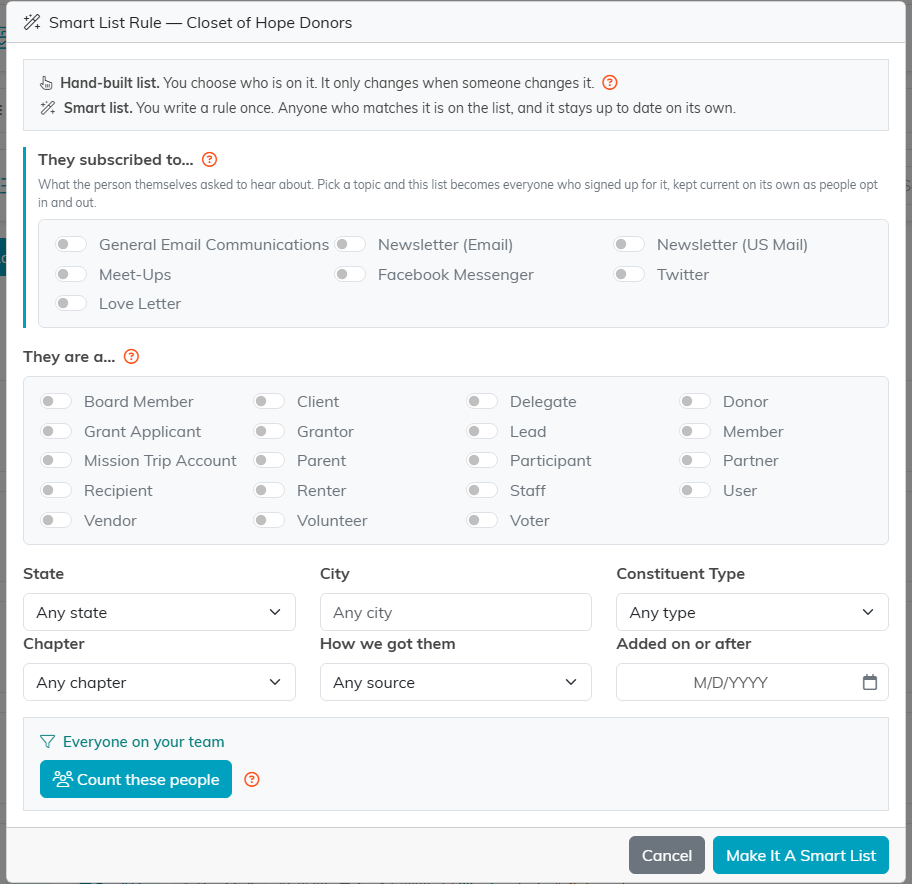
The wand opens this. Make It A Smart List saves the rule.
Controlling Who Can See a List
To limit a list to a specific department or group, open the list and use its Record Permissions tab. Permissions are set on the list itself, not when you first create it.
