Knowledge Base Article
Add Product Order
A product order is an order you place with one of your vendors. Argenta tracks it from the day you place it through to the day the goods arrive, and fulfilling the order is what puts the items into your inventory. That is the whole point of raising the order rather than typing stock in by hand.
Raise the order
- Choose Products & Inventory > Product Orders from the menu on the left to see all your orders and their status.
- Click Add A New Order.
- In the Order Header, choose the Vendor you are ordering from and the Order Date. Both are required. If the vendor does not exist yet, see Add Vendors.
- Under Add Items To This Order, pick the Product, check the Item Cost, and enter the Quantity. Product and quantity are required, and the cost fills in from the product record.
- Click Add Item. Repeat for each product on the order, watching the running Order Total.
- Click Complete Order to save it and return to your Product Orders list.
Only products already in your catalog can go on an order, so add anything new under Products first. Your order appears in the list as Unfulfilled because the goods have not arrived yet.
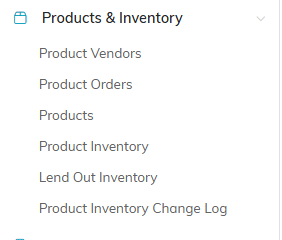
Product Orders is the second item under Products and Inventory.
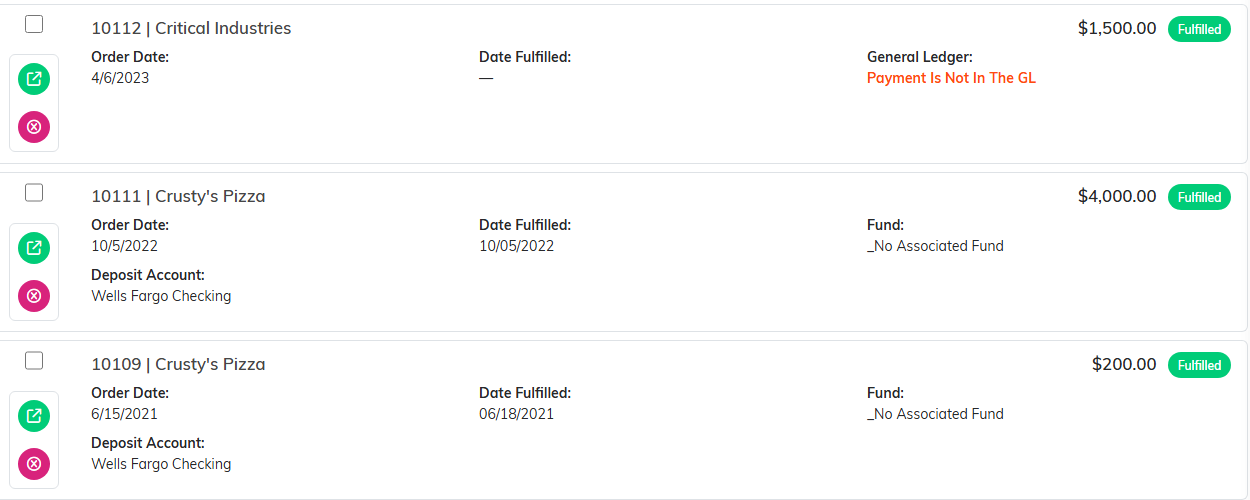
The list shows every order and where it stands.

Add A New Order opens a blank order.
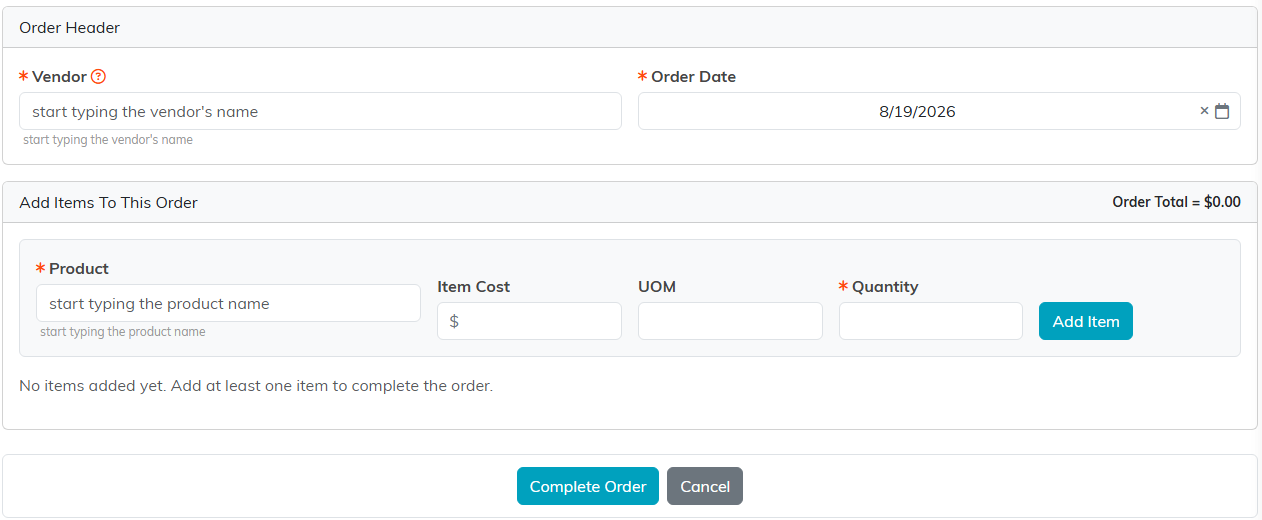
Vendor and Order Date first, then a line for each product.
Fulfill the order when the goods arrive
Open the order from the list to reach Order Details, then work in the Fulfill Items In This Order To Add Them To Inventory section:
- Fulfill Entire Order takes in the whole order at the quantities you ordered and marks it fulfilled. This is the normal case.
- Fulfill a single line when only part of the delivery turned up. Each line carries its own fulfilled or unfulfilled status, so a split delivery is handled properly.
- Save Status & QTY Changes updates the status and quantity on unfulfilled lines. Use it when a line is back-ordered, when you received a different quantity than you ordered, or when an item is unavailable. The status options come from your own configured list.
- Return Entire Order reverses a fulfilled order, taking the items back out of inventory and returning the lines to unfulfilled. There is a per-line return as well when only some of it goes back.
Date Fulfilled becomes editable once the order is fulfilled, and Order Status shows Unfulfilled or Fulfilled throughout.
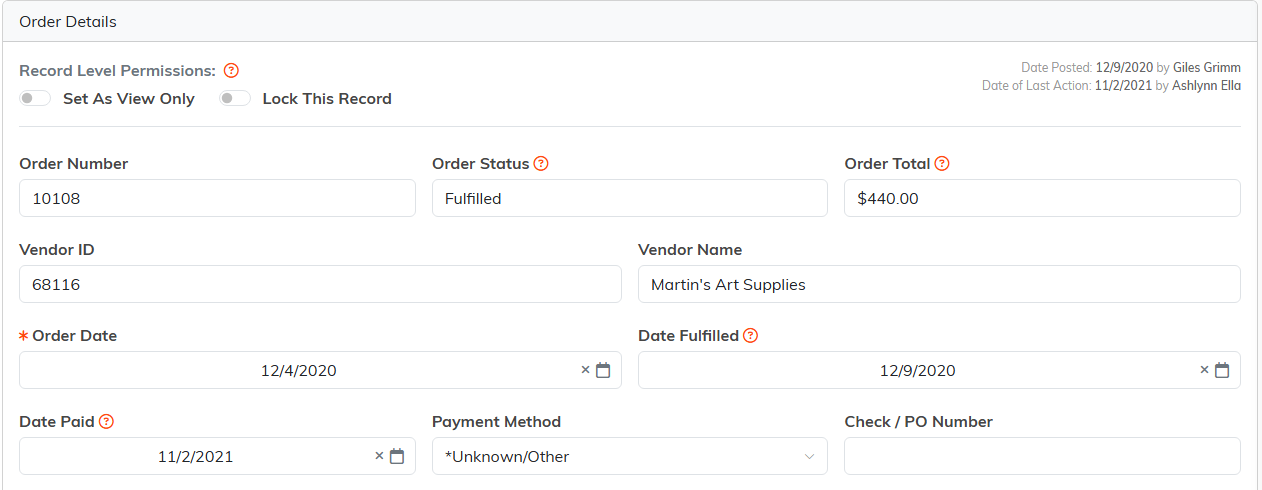
Order Number is generated for you, so leave it alone.
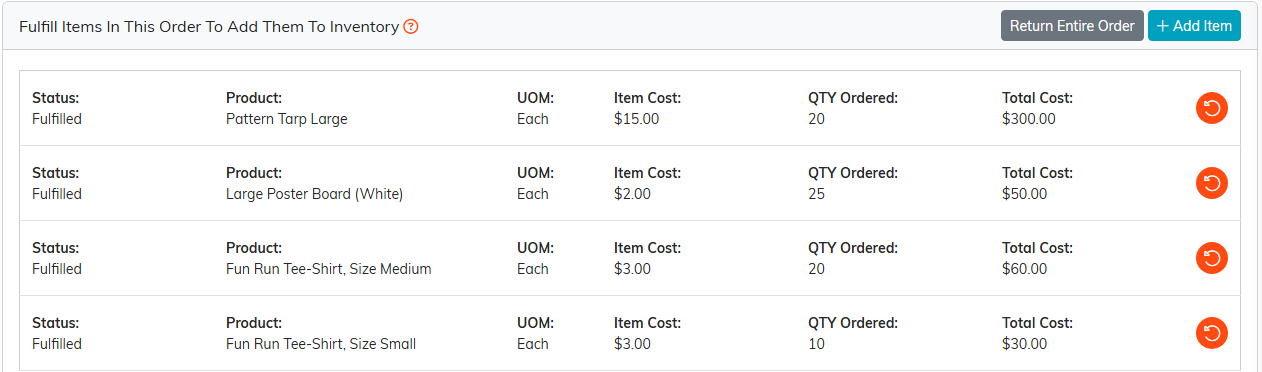
Each line carries its own status, so a split delivery is handled properly.
Record the payment
Fill in Date Paid, Payment Method, and Check / PO Number to record how you settled the order. Order Total is worked out from the lines and their costs, and Order Number is generated by Argenta, so leave it alone.

This is the money side of the order.
Post it to your books
Turn on Add Order To The General Journal to put the order into your accounting. Three fields appear:
- Fund, which is required.
- Asset Account Used for Payment, the bank account the money came from.
- Account (Chart of Accounts), the account this spend belongs to.
Once it has posted, the label changes to "This order is in the General Journal" and a link appears to view the matching account transaction.

Once it has posted, a link appears to the matching account transaction.
The rest of the Order Workspace
- Refunds for money coming back from the vendor.
- Order Files for the invoice, packing slip, or quote. See Add Related Files.
- Order Notes for anything worth remembering. See Add A Note to the Notes Section.
- Record Permissions to set the order view only or lock it to specific users.

Every page of the order is on this bar.
You need the Products Manager or Admin role to add orders.
