Knowledge Base Article
Add Grants We Receive
A grant is money awarded to your organization for a particular purpose. This walks through creating a grant receivable record and filling in the Grant Details page.
Create The Grant
- From the menu on the left, go to Grant Management > Grants Receivable.
- The list of your grants opens. Click Add New.
- The Grant Workspace opens on Grant Details.
Only two fields are required, both marked with an orange asterisk: Grantor and Grant Title. Fill those in and save, then build the rest out as the grant progresses. Most grant records get filled in over months, not in one sitting.
There is also a Copy & Add New action on each row in the list, which is the quick way to enter next year's version of a grant you already have.
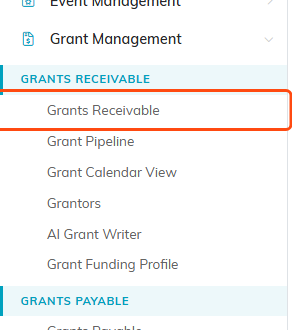
Grants Receivable sits under Grant Management in the main menu.
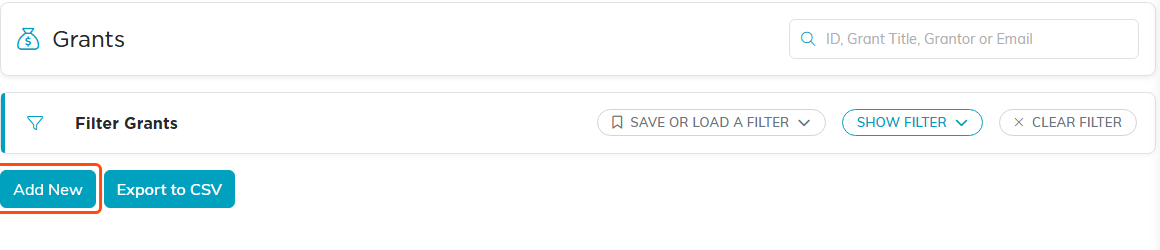
Add New is under the filter bar on the grants list.
The Grant Workspace
A grant record has nine pages:
- Grant Details: everything below.
- Draft Proposal and Draft Report: write the proposal and the funder report against this grant.
- Budget: the grant's budget.
- Connections: link the programs, tasks, time sheet tasks, expenses, deposits, and properties the grant touches.
- Notifications: deadline and report reminders by email.
- Grant Files and Grant Notes: the award letter, correspondence, and your running notes.
- Record Permissions: who else can get at this record.

The nine pages of a grant record, across the top of the workspace.
Who The Grant Is From
- Grantor (required): start typing to find the grantor. They must already be designated as a grantor, so if they are not, add them first. See Add Grantors.
- Grant Title (required): what you will recognize this grant by in a list of two hundred. Include the funder and the year.
- Grant's Current Status: where the grant stands right now, from your own status list. Keep it current, because this is what makes your pipeline mean anything.
- Assigned to Team Member: who owns it. An unassigned grant is one nobody is writing.
- Delivery Method: how the application gets submitted.
- Grant URL/Website: the funder's page for this opportunity.

Grantor and Grant Title carry the orange asterisk. The rest can wait.
The Funder's Contact
Contact Name, Contact Email, and Contact Phone. Worth filling in every time. Program officers are the difference between a declined application and a useful conversation, and that knowledge should not live in one person's inbox.

The funder's contact details, with the opportunity's web page below them.
The Money
- Grant Amount: what you are requesting, or what you were awarded.
- Floor Amount and Ceiling Amount: the range this funder will consider, useful while you are deciding what to ask for.
- Funding Amount (Actual): what actually arrived. Keeping this separate from Grant Amount is what lets you see the gap between asked and received.
- Installment Amount and Installment Frequency: for grants paid in pieces rather than one payment.

What you asked for, the range the funder considers, and what actually arrived.
The Dates
These drive both the Grant Calendar View and your reminders, so they earn their keep:
- Due Date: the application deadline.
- Date Submitted: when you sent it.
- Notification Date: when you expect the funder's decision.
- Start Date of Funding and End Date of Funding: the grant period.
- Report Due Date: when the funder expects your report.
A grant only shows on the calendar under the date type you are plotting by, so a blank date means an invisible grant.

The six dates. A blank one keeps the grant off the calendar.
Classifying And Placing It
- Grant Type and Grant Category: your own classifications. Add a new value from the dropdown if the one you need is missing.
- Fiscal Year and Current or Future Grant: where it sits in your financial planning.
- Chapter, Division, and Department: which part of the organization the grant belongs to. These also drive record visibility, so users restricted to a department only see that department's grants.

Your own classifications, plus who owns the grant.

Chapter, Division and Department also decide who can see the record.
The Narrative
- Grant Description: what the grant is.
- Funding Purpose: what the money is for.
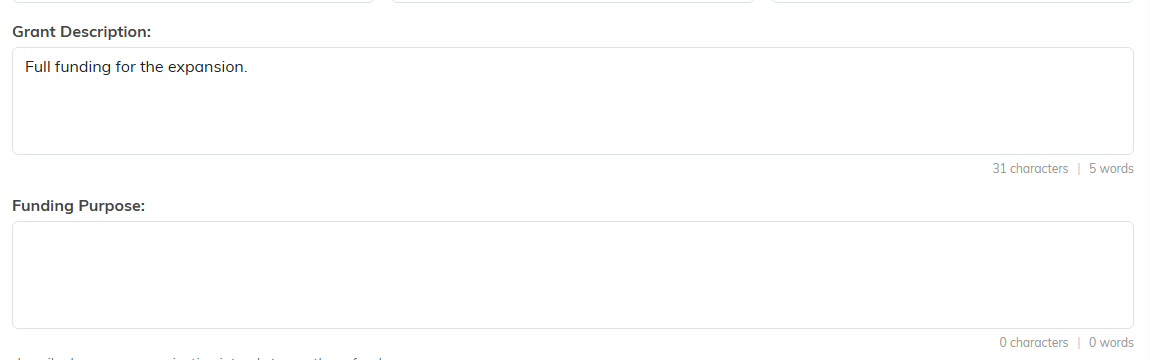
What the grant is, and what the money is for.
Conditions Attached To The Award
Further down are switches for the strings attached. Turn one on and its detail fields appear:
- Match Required plus Match Amount: the funder wants you to raise a matching sum.
- Multi-Year Grant plus Grant Start Year and Grant End Year.
- Renewable Grant plus Renewal Date: the award has to be re-requested.
- Restricted Grant plus Restricted Grant Description and/or Requirements: limits on how the money may be spent.
- Challenge Grant plus Challenge Grant Description and/or Requirements: the award depends on you hitting a target.
- Project Grant plus Corresponding Project: ties the grant to a project.
Fill these in while the award letter is in front of you. Quote the funder's wording rather than summarizing it, because the summary is where the meaning slips.
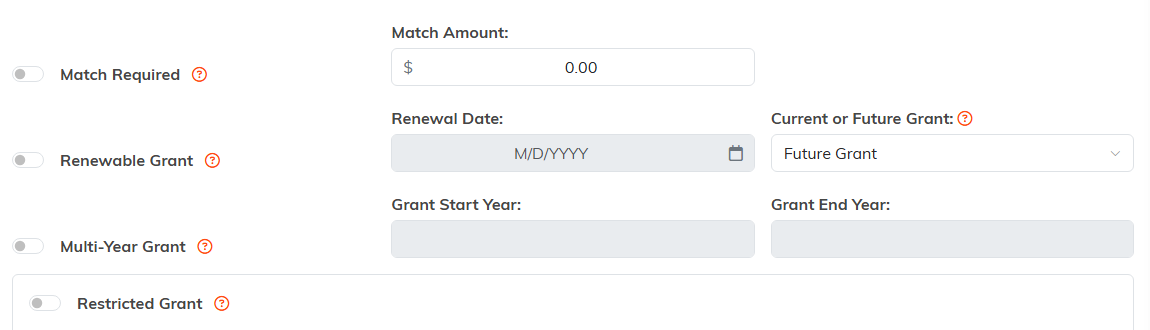
Turn a switch on and its detail fields appear beside it.
Record Permissions
At the top of the page are two switches:
- Set As View Only: others can read the record but not change it, unless they created it, are a master admin, or are granted access on the Record Permissions page.
- Lock This Record: stronger. Others cannot view or update it under the same exceptions.
Chapter, Division, and Department assignments layer on top of this, so restricted users only see records in the parts of the organization they have been given.

Both switches sit at the very top of the Grant Details page.
Save
Use Save All Changes & Continue to save and keep working, or Save All Changes & Exit to save and return to the list.

The two save buttons at the bottom of the page.
What To Do Next

The two reminder buttons appear once the matching date is filled in and still ahead.
- Set up reminders on the Notifications page, where Set a deadline reminder and Set a report reminder build them from the dates you just entered.
- Use Connections to link the programs and projects the grant funds, so reporting later is a lookup rather than an investigation.
- Attach the award letter under Grant Files while you still have it to hand.
