Knowledge Base Article
Add Constituent - Organization
A Constituent is any individual, household, or organization affiliated with your nonprofit. Board members, clients, donors, grantors, grant applicants, leads, members, partners, parents, participants, recipients, staff members, vendors, and volunteers are all created as constituents, then given one or more roles based on how they interact with your organization. This article covers how to add an Organization.
Start a new Organization
From the left-hand menu, choose Constituents (CRM) > Constituent List. This opens your Constituent List. Click the Add A New Constituent button at the top of the list.
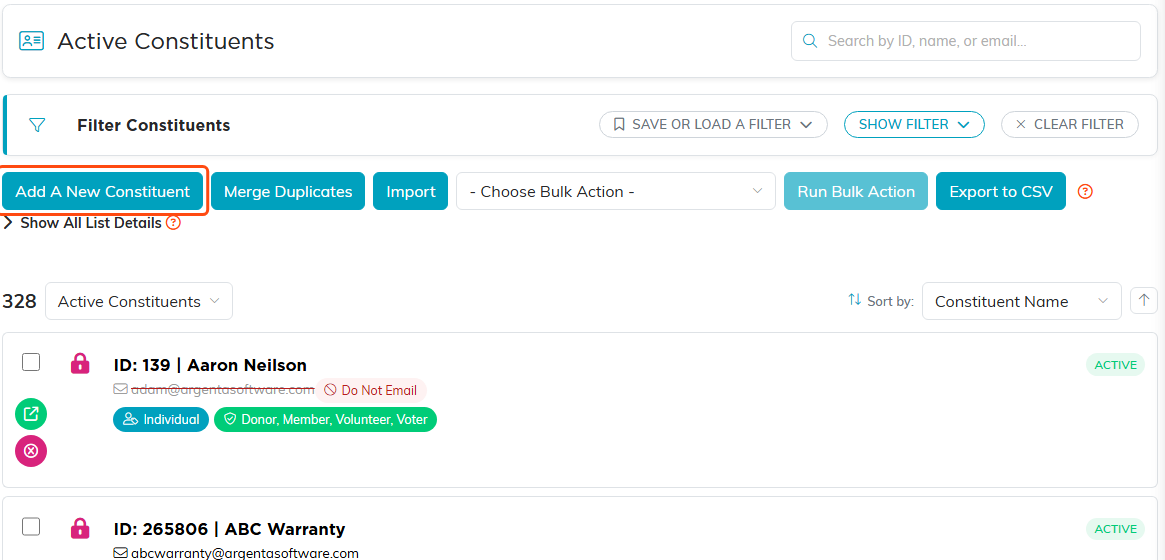
Add A New Constituent sits at the top left, above the list.
You will see the screen titled What type of Constituent would you like to create? with three choices: An Individual, An Organization, and A Household. Click An Organization, type the Organization Name, and click Create & Continue. Argenta creates the organization and opens its Constituent Workspace.
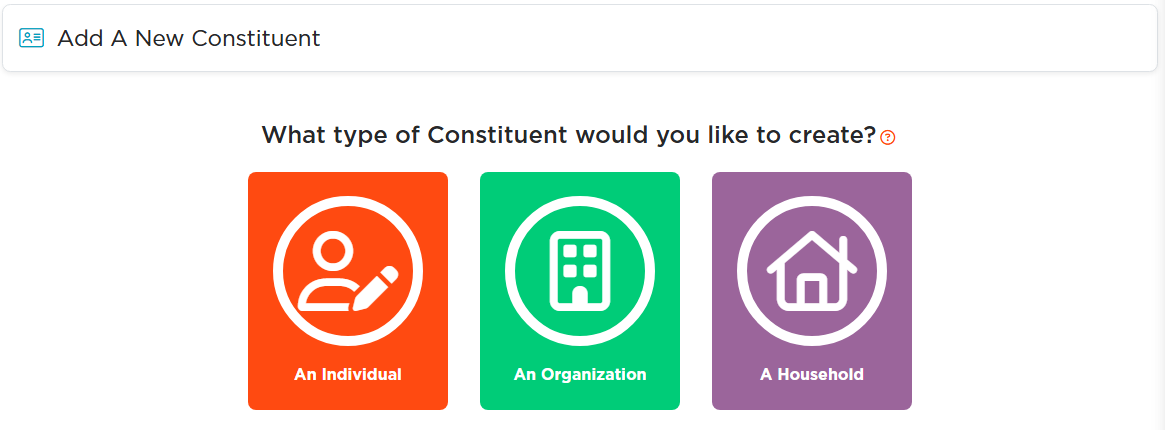
Three choices. The type you pick decides which sections the record gets, so an Organization is not the same record as an Individual.
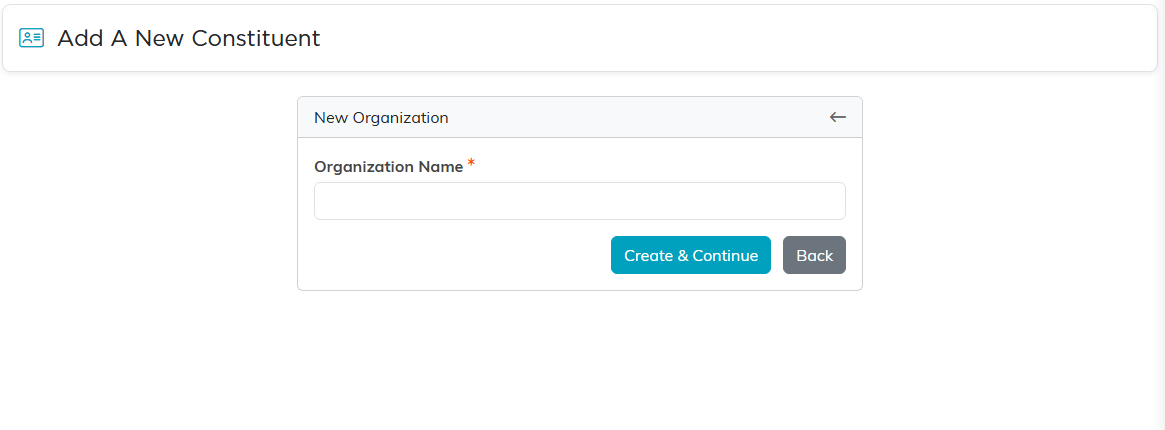
The name is the only thing you need to get started. Everything else can wait.
Getting around the Constituent Workspace
Across the top of the workspace is the Workspace Menu, a row of icons you click to move between the sections of the organization's record. For an Organization, the sections are: Constituent Details, Addresses, Contact Info, Delivery, Recognitions, Org Details, Focus, Affiliated Individuals, Contacts, Communication, Engagement, Follow-Up, Notifications, Contact Log, Email Log, Constituent Files, Constituent Notes, and Permissions.

Your own menu may be shorter or longer than this one. Sections appear as the modules they belong to are switched on, which is why Mission Trips shows here.
Only fields marked with a small orange asterisk are required. On an Organization, that is the Organization Name. Everything else is optional, so fill in what makes sense for your nonprofit. To save, use the Save All Changes (disk) icon in the workspace title bar, the Save & Continue button to save and stay on the section, or Save & Exit to save and return to the Constituent List. Exit Record leaves without saving. When you move from one section to another, Argenta saves your changes for you.
Constituent Details
This is the section you land on first. At the top you will find a set of on/off switches:
- VIP, Ambassador, and Minor – flags you can turn on for filtering and reporting.
- Active – on means the organization is an active constituent; turn it off to make the record inactive.
- View Only – restricts the record to view-only access. Only the user who created it, a master admin, or a user you grant access to on the Permissions section can edit it.
- Locked – locks the record so it cannot be viewed or edited except by the user who created it, a master admin, or a user you grant access to on the Permissions section.

VIP, Ambassador, and Minor sit up in the header. Active, View Only, and Locked sit just below with the record's history on the right.
The fields on this section are:
- Organization Name – the name of the organization (required).
- Salutation, Formal Salutation, and Envelope Salutation – how the organization is addressed on mailings and emails (for example, Empire Corp. / The Empire Corporation / The Empire Corporation).
- Chapter, Division, and Department – tie the organization to a part of your nonprofit for tracking and reporting.
- Acquisition Source – how you came to know this organization.
- Referred By – start typing a name to link the constituent who referred this organization.
- Description – any notes you want to keep about the organization.
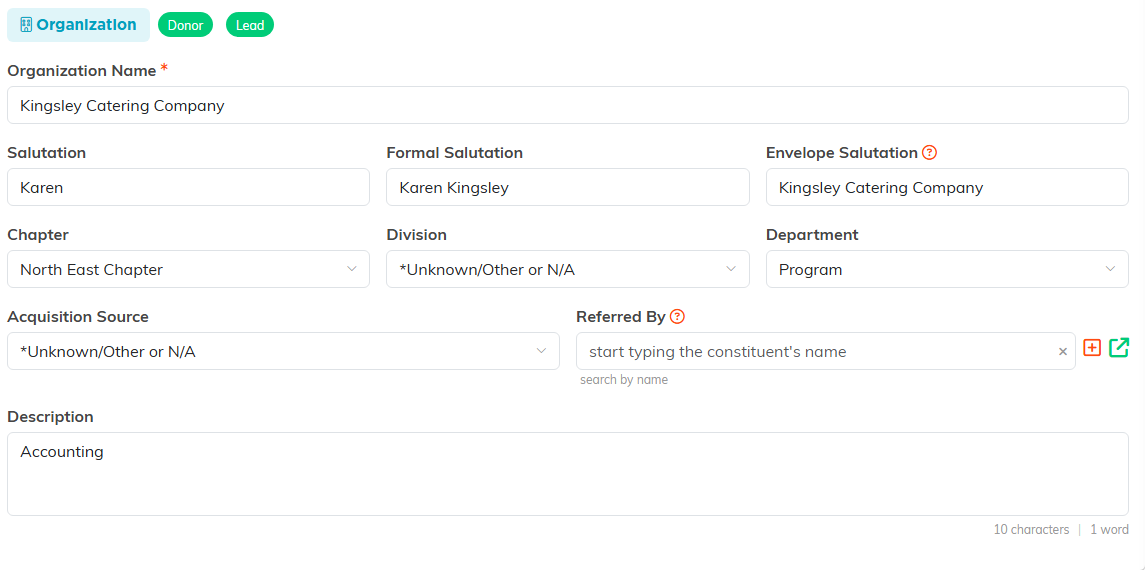
The red asterisk marks the only required field. The three salutations are what mailings and emails address the organization by.
The organization's profile details, such as its type, tax ID, and mission, are entered on the Org Details section described below, not here.
Addresses
Enter the organization's mailing, billing, shipping, and alternative addresses here, along with options such as Do Not Send Mail, County, Country of Residence, and which address is the physical address. The billing and shipping areas include shortcuts to mark them the same as another address you have already entered. On political accounts, District and Precinct also appear here.
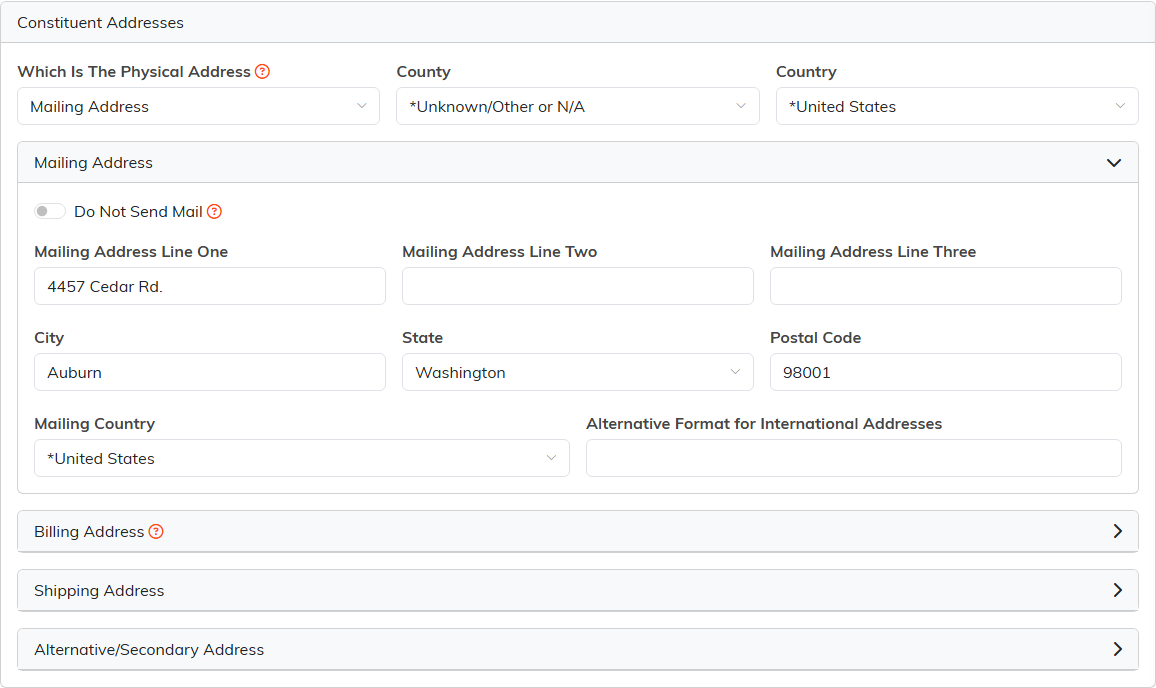
Each address type collapses on its own row. Open the one you need and leave the rest closed.
Contact Info
Enter the organization's email addresses, phone numbers, fax, extension, preferred method and time of contact, and the Do Not Email, Do Not Call, and Do Not Text preferences. This is also where you can send the organization a text message when texting is set up for your account.
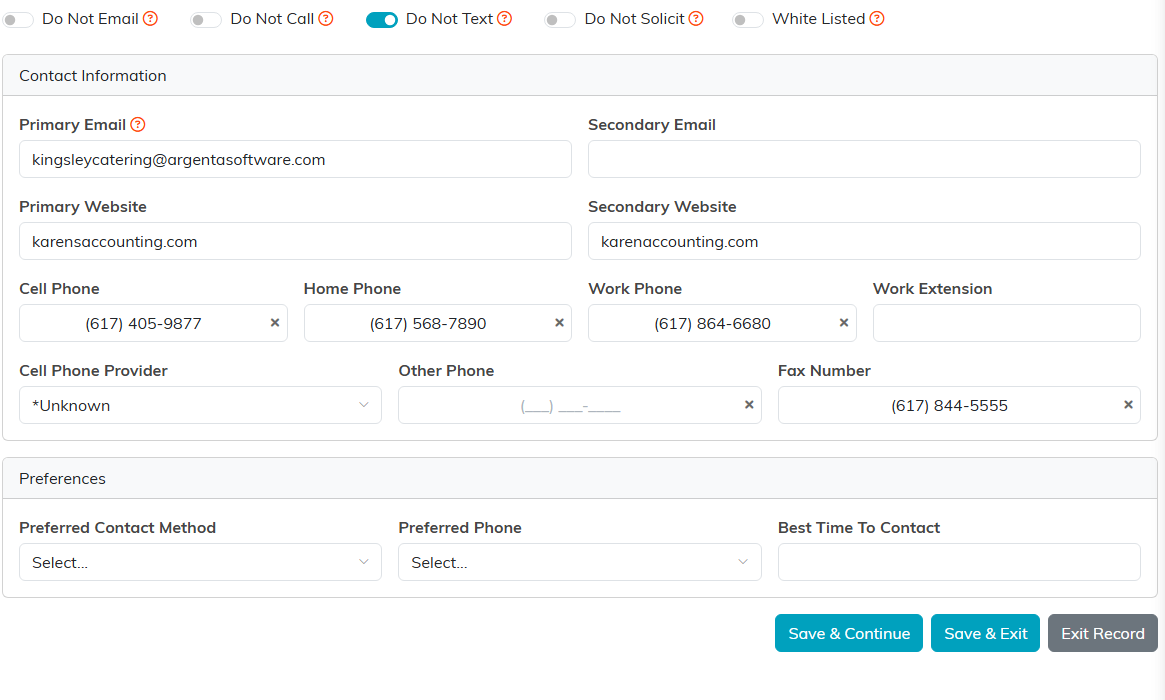
Fill in what you have. The do not contact preferences sit under these fields.
Delivery
Use this section to record delivery information for the organization.
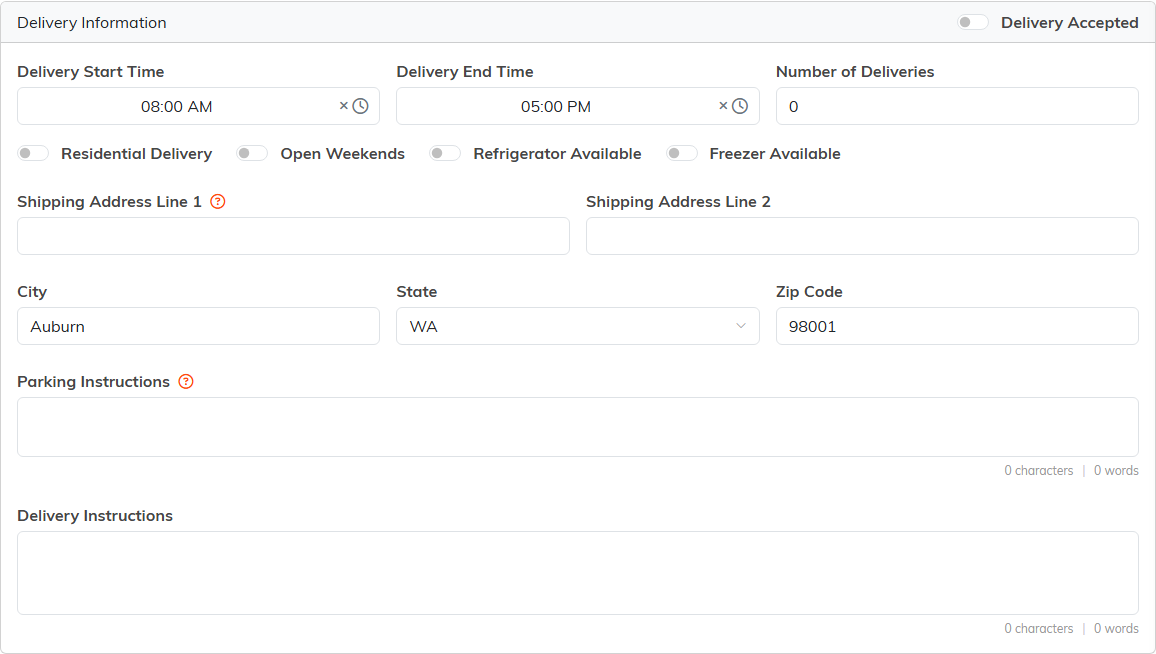
Worth filling in for any organization you actually drop things off at. The instructions boxes are what your driver reads.
Recognitions
Track the organization's awards and recognitions here. Pick the award or recognition from the Recognition list, set the Date, and click Add.

The list of recognitions comes from your own classification codes.
Org Details
This is where you capture the organization's profile. It has three cards:
- Organization Details – a Tax Exempt switch, plus Organization Type, Organization Size, Industry, Year Established, Geographic Focus, Nonprofit Type, Federal Tax ID, and SAM Registration Number.
- Mission & Vision – the organization's Mission Statement and Vision Statement.
- Financial & Funding – Annual Operating Budget for the current and previous year, Client Demographics, Funding Keywords and Phrases, and Parking Instructions.
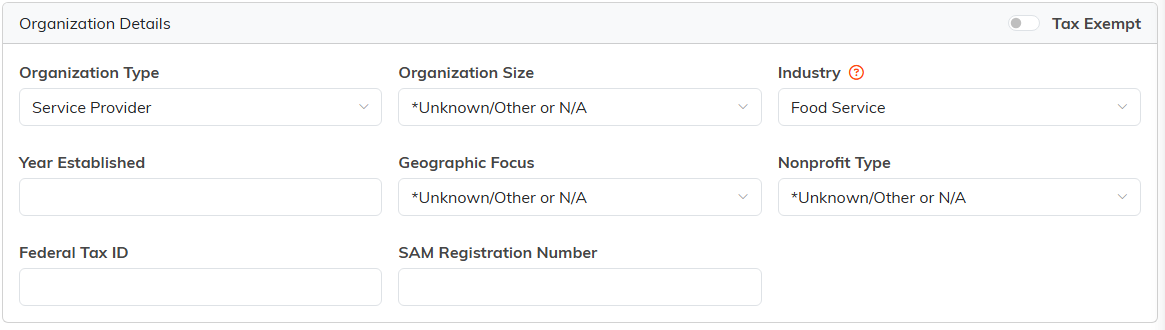
The first of the three cards. Tax Exempt is the switch in the header, not a field in the body.
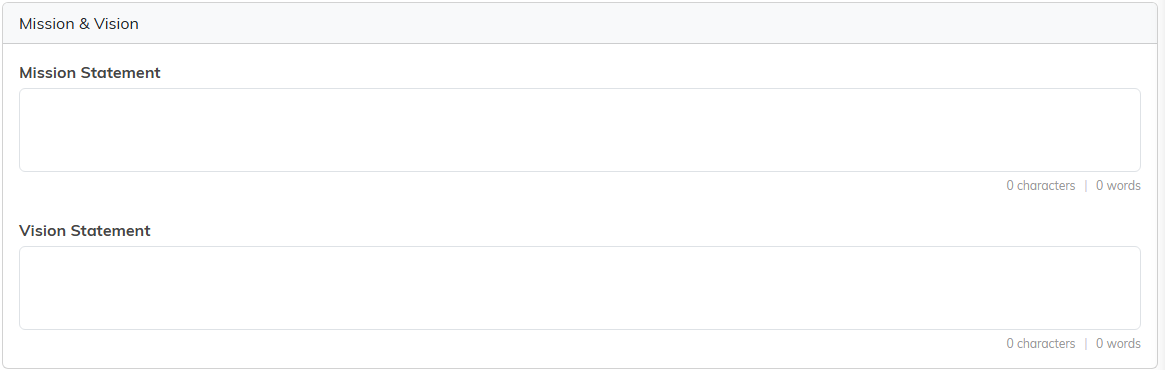
Both boxes are free text, so paste the organization's own wording rather than summarizing it.
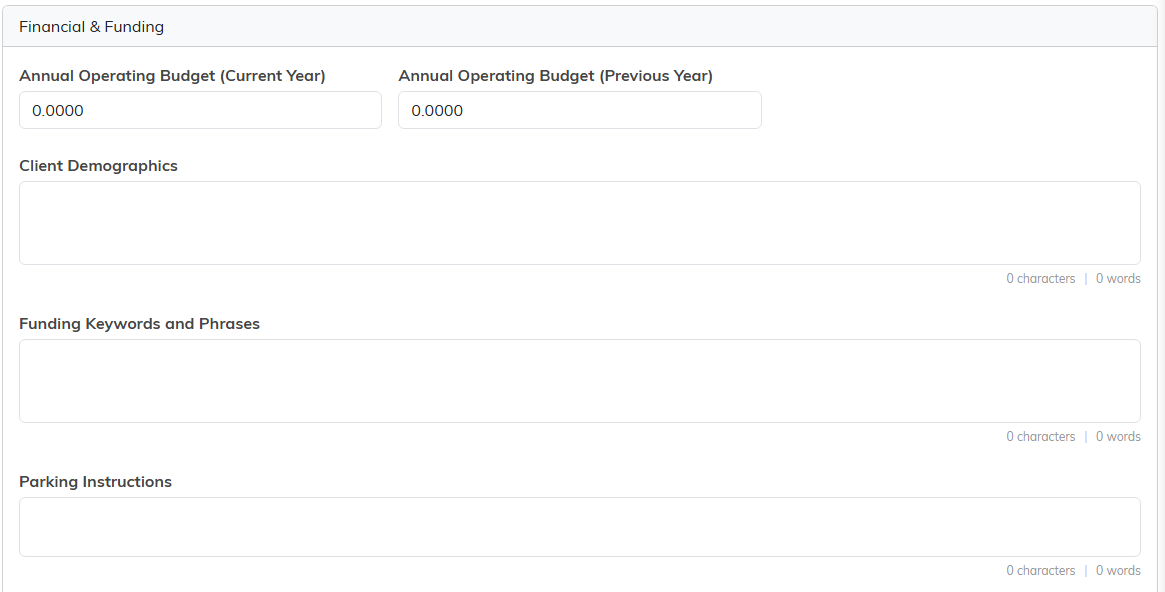
Funding Keywords and Phrases is the one to fill in if you ever want to find this organization by what it funds.
If a type, industry, or other list value you need is not there, you can add a new one from the same drop-down. Click Save All Changes when you are done.
Focus (Mission Focus / Purpose)
Tag the organization with the focus areas it works in. Choose an Industry / Focus Area from the drop-down and click Add. Add as many as you need; each one can be removed with the delete icon next to it.

Add as many as apply. The list of focus areas is your own, so you can add one from Classification Codes if what you need is missing.
Affiliated Individuals
This section links existing constituents to the organization as its members. The person must already exist as a constituent. In Search Constituent, start typing a name, select the person, and click Add. For each member you can open their record, set a Position or Job Title, mark one member as the primary contact with Set Primary, or remove them.

The person has to exist as a constituent first. The small orange icon beside the box creates one without leaving the page.
Contacts (Organization Contact List)
Use this section for the organization's points of contact who are not separate constituent records in Argenta. Click Add New and enter the Contact Name, Title, Email, Phone, Extension, and Cell Phone, then choose a Contact Type of Primary, Secondary, or Additional. Click Save to store the contact. Saved contacts can be edited or deleted with the icons next to each one.
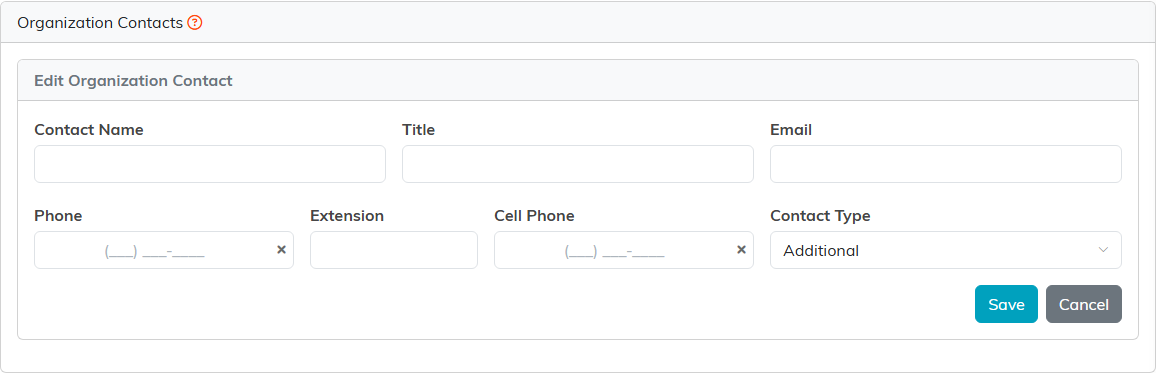
Use this for a person you want to reach at the organization but do not want as a constituent record of their own.
Communication
Record the organization's websites, the types of communication it would like to receive, and its social media accounts. To add a social account, click Add New under Social Media Accounts, choose the platform, enter the profile address, and save.
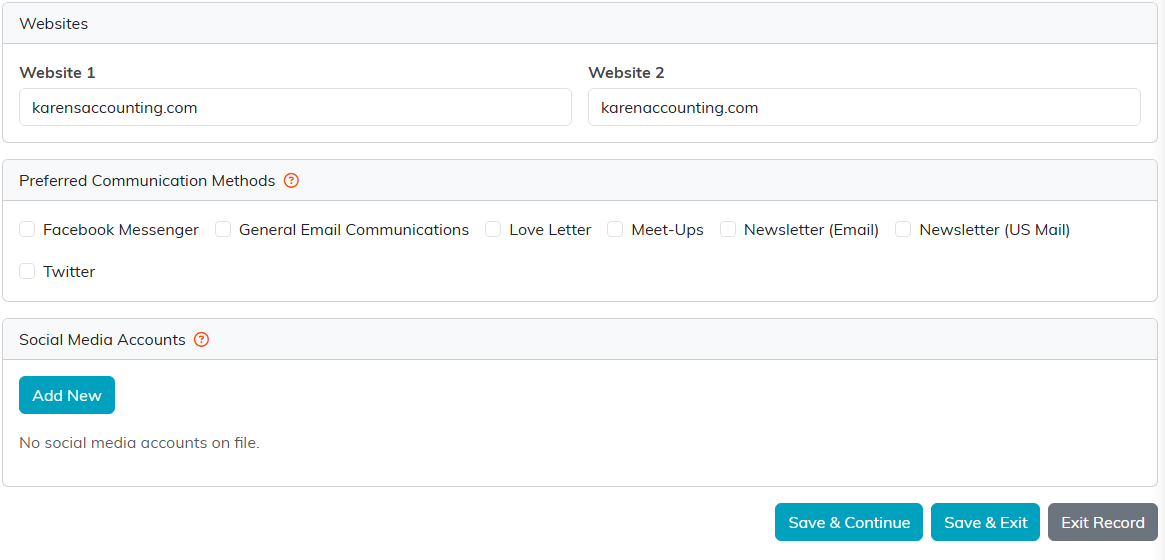
Three cards on one section. The communication methods are your own list, so yours will not match this one.
Logs and related records
The remaining sections keep a history for the organization: Engagement, Follow-Up, and Notifications, plus the Contact Log (contacts you have logged), Email Log (system emails sent to the organization), Constituent Files (related files you upload), and Constituent Notes (related notes). For a brand-new organization these will be empty until activity is recorded. For step-by-step help, see Add Contact to Contact Log, Add A Note To The Notes Section, and Add Related Files.
Permissions (Record Permissions)
This section controls who can see and edit the organization record. It has two panels:
- View Only Access – when the record is set to View Only, the users you list here can still edit it. In the Add User box, start typing a user's name, select them, and click Add.
- Locked Record Access – when the record is Locked, the users you list here can still access it. Add users the same way: type the name in Add User, select, and click Add.
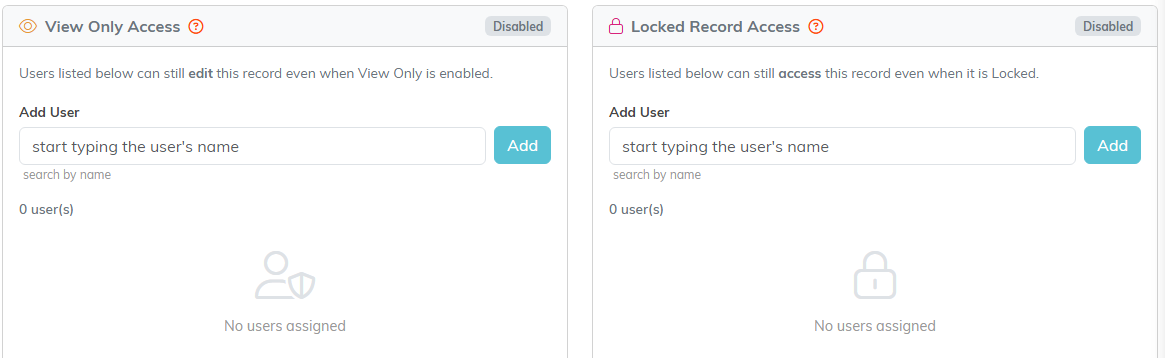
Both panels read Disabled until you turn the matching switch on back in Constituent Details.
Permissions also work alongside any chapter, division, district, precinct, or department restrictions you have set for your users.
