Knowledge Base Article
Working with Email Batches
Every time you send an email from a template in Argenta, it goes out as an Email Batch, whether it's a single email or thousands. Every batch is saved so you can track how each send performed.
Finding Your Email Batches
Open Email Batches from the left menu. You'll see every batch you've sent, along with how each one did: opens, bounces, unsubscribes, and more. To dig into a single batch, click its open icon.
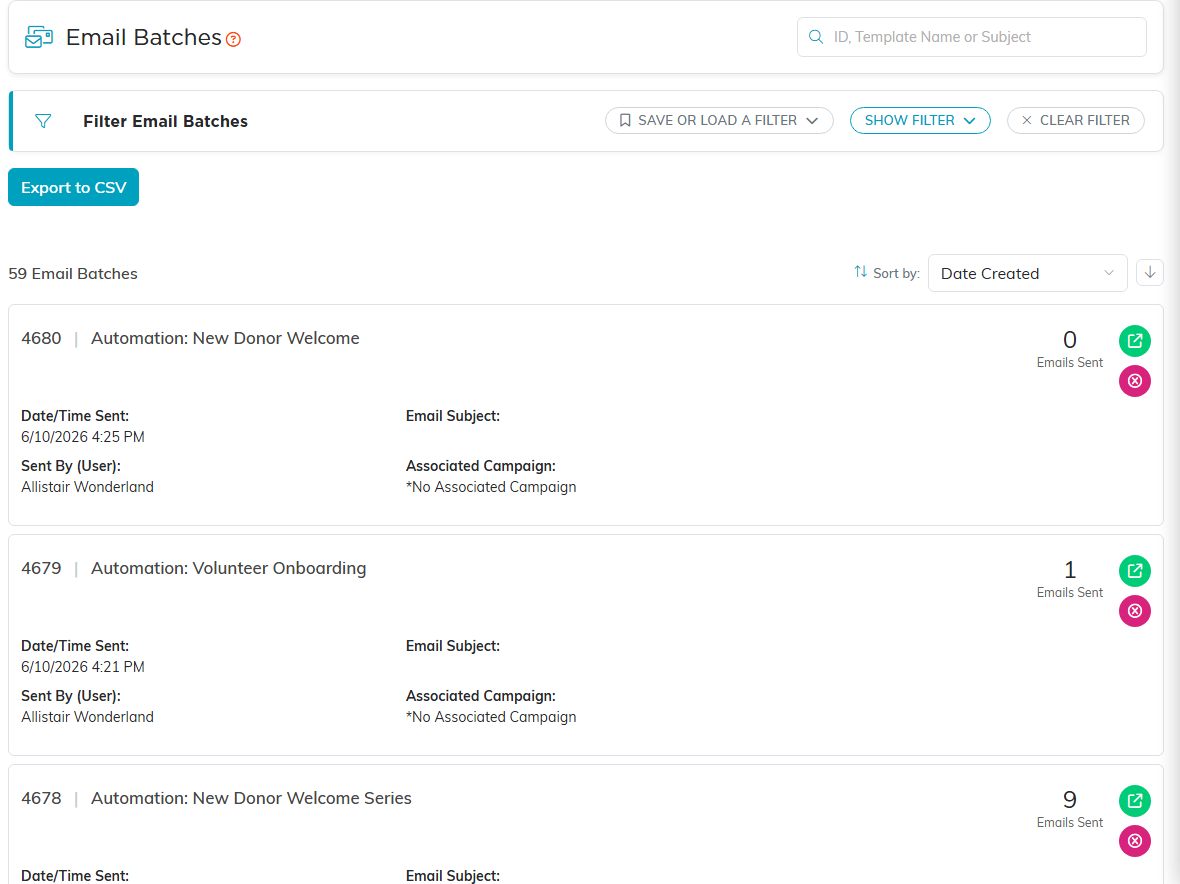
Every batch your team has sent.
The Email Batch Workspace
Opening a batch takes you to the Email Batch Workspace, which has six tabs:
- Batch Details: The batch's key information, the send date, the template name, the subject line, and the campaign it's tied to. You can change the associated campaign here. This tab also holds the record-level permissions, Set As View Only and Lock This Record.
- Template: A read-only look at the exact template that went out, the from address, greeting, subject, and body, so you can see precisely what recipients received.
- Emails: The full list of the emails in this batch and their status, so you can see who was sent to and how each message did.
- Unsubscribes: Everyone who unsubscribed from this batch. When someone unsubscribes, Argenta automatically marks Do Not Email on their constituent record.
- Complaints: Anyone who reported the email as spam. If a supporter says they aren't getting your emails, check here first.
- Record Permissions: Control who can view or edit this batch. Add a user to grant them view-only or locked-record access.
If you change anything on the Batch Details tab, save your changes before you move to another tab.
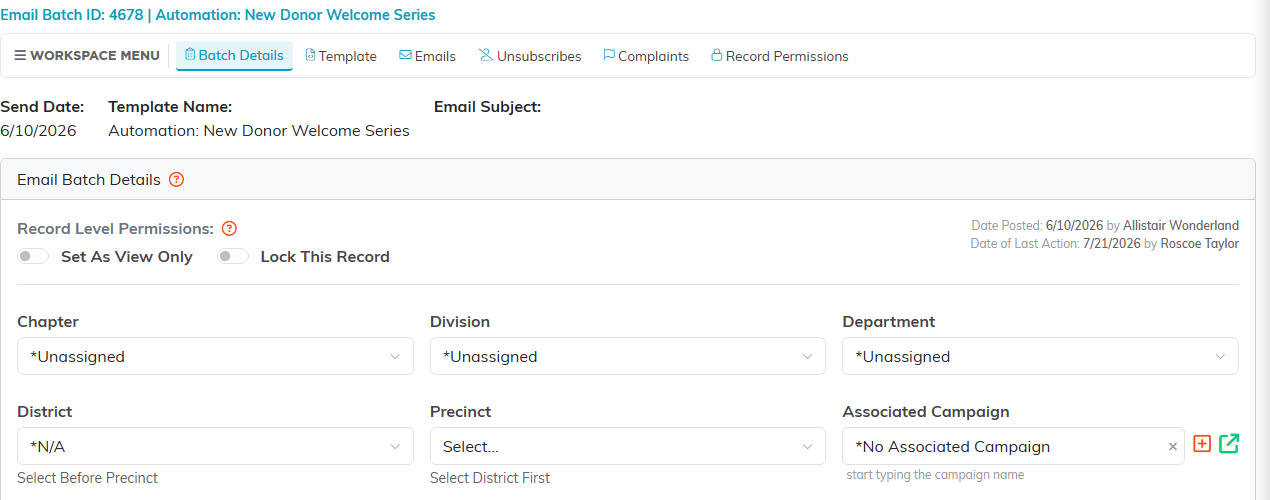
The batch workspace and its tabs.
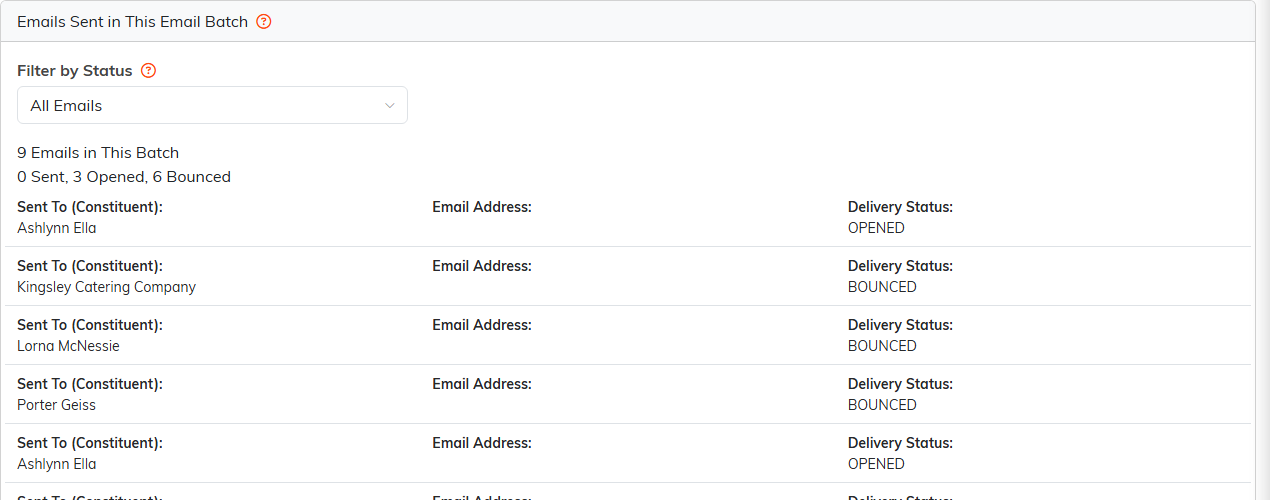
The Emails tab, one row per recipient with its delivery status.
What the Batch Tells You
Argenta tracks each batch's performance for you: how many emails were sent, opened, and clicked, how many bounced, how many people unsubscribed, and how many reported the message as spam. Together these numbers show you how the send performed and who to follow up with.
