Knowledge Base Article
Add A New Mission Trip
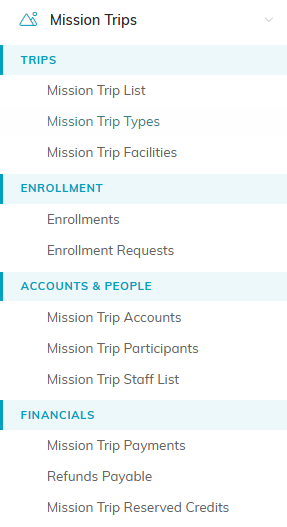
This opens your full list of Mission Trips. Next click the "Add New" button:
This will take you to the Mission Trip Workspace screen:
Argenta displays information about when and who is creating the record at the top of the screen. This feature provides a user audit functionality to help you with training and communication in your organization.
On the Mission Trip Details tab please enter:
- Record Permissions - Set As View Only - Placing a checkmark in this box restricts this record to view only access unless the user is the user who created the record, the user is a master admin, or the user is given specific permission to modify this record on the Record Permissions tab of this record. Permissions also work by assigning a department, district and/or precinct. If you have users in your system who are restricted by these permissions, they will only be able to see records in the departments/districts/precincts you have granted them access to.
- Record Permissions - Lock This Record - Placing a checkmark in this box locks this
record so that users cannot view or update the record unless the user is the
user who created the record, the user is a master admin, or the user is given
specific permission to access this record on the Record Permissions tab
of this record. Permissions also work by assigning a department, district
and/or precinct. If you have users in your system who are restricted by these
permissions, they will only be able to see records in the
departments/districts/precincts you have granted them access to.
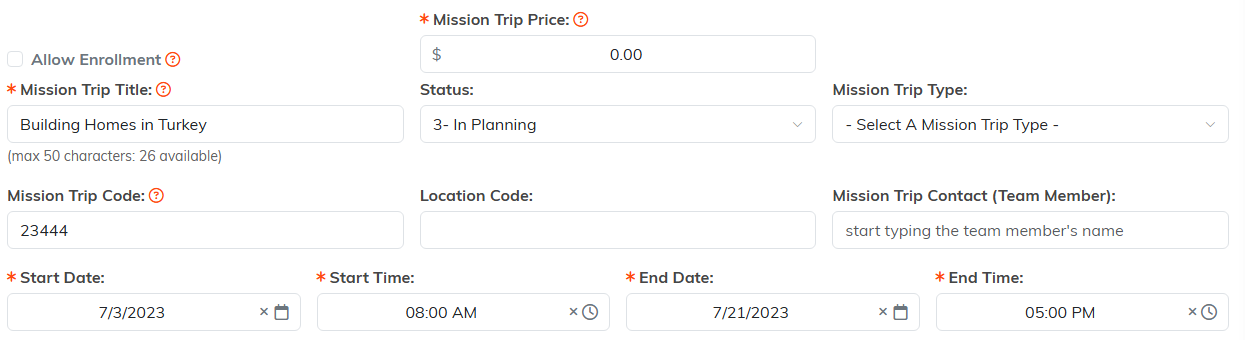
- Allow Enrollment - Marking this checkbox opens enrollment for the Mission Trip you're creating. You may choose to leave the mission trip closed for enrollment during the planning stages, or before you want to open registration.
- Mission Trip Title - You must provide a title for the mission trip by entering it here. This must contain 50 or fewer characters. This is a required field.
- Status - Mission Trips in Argenta go through a status cycle from new through complete. Use the Status drop-down list to choose where the Mission Trip will begin in the status cycle.
- Mission Trips Type -Types are created and maintained in a separate section of the Mission Trip Module. If you would like to assign a Mission Trip Type select it from the drop-down list.
- Mission Trip Code - If you have a code or number you use to identify your mission trips, you can enter it here.
- Location Code - Use this field if you use location codes.
- Department - If the Mission Trip is related to a specific department in your organization, you can select it from the drop-down menu.
- Start Date - Enter a start date for your mission trip by manually entering a date or by using the calendar selector. This is a required field.
- Start Time - Enter a start time for your mission trip by manually entering a time or by using the time selector. This is a required field.
- End Date - Enter an end date for your mission trip by manually entering a date of by using the calendar selector. This is a required field.
- End Time - Enter an end time for your mission trip by manually entering a time or by using the time selector. This is a required field.
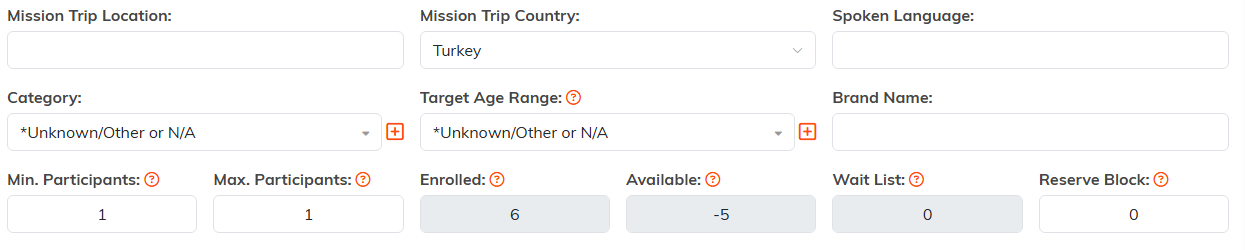
- Mission Trip Location - Enter a location for your mission trip. This is not a required field but it is used in many places to help with reporting and searching.
- Mission Trip Country - Enter a country for your mission trip. This is not a required field but it is used in many places to help with reporting and searching.
- Spoken language - If the trip is outside of the US and a different language is spoken in the target country, you can indicate the language spoken here.
- Mission Trip Contact (Team Member) - If a team member from your organization will act as the contact for a mission trip, you can use this field to assign the trip to that team member. Simply click the Lookup button to search for and designate the appropriate team member.
- Brand Name - If you sell mission trips under a brand name, you can enter the name here.
- Mission Trip Price - Enter a price for your mission trip here. This is a required field.
- Target Age Range - If your mission trip is targeted toward a specific age range, you can specify that here. Target Age Range is considered a classification code. Argenta comes loaded with common target ages to help you get started, but you can change them at any time. You can add or delete any classification code by selecting Classification Codes from the Argenta main menu on the left-hand side of the screen. Select an age range from the drop-down menu.
- Category - You may choose to assign a category to your mission trip for reporting and filtering purposes. Categories are considered a classification code. Argenta comes loaded with common mission trip categories to help you get started, but you can change them at any time. You can add or delete any classification code by selecting Classification Codes from the Argenta main menu on the left-hand side of the screen. Select a category from the drop-down menu. If an applicable category is not listed you can add a new one by selecting the Add New button. Type in a new name for your category and it will be added and selected.
- Min. Participants - If the mission trip requires a minimum number of participants enter the number here.
- Max. Participants - If the mission trip has a maximum number of participants enter the number here.
- Enrolled - This will display the current number of enrollments you have entered in the enrollment section. This field is read-only and cannot be changed manually. It will be updated automatically according to your enrollments.
- Available - This will display the current number of spots you have left for the mission trip. This field is read-only and cannot be changed manually. It will be updated automatically according to your enrollments.
- Wait List - This will display the number of wait list spots you have for this mission trip. This field is read-only and cannot be changed manually. It will be updated automatically according to your enrollments.
- Reserve Block - If you would like to decrease the number of available slots because you want to reserve them without an actual enrollment you can enter the number of slots you would like to reserve here.
- Reserve Block Reason -If you do enter a reserve block, you may want to make a note about it. You can enter a reason and some notes in this field.
- Mission Trip General Description - If you would like to provide an overall description for the Mission Trip you can enter it here.
- Cancel Date - If the Mission Trip gets canceled use this field to indicate the date it was cancelled. You can manually type in a date or use the calendar selector.
- Cancel Reason - If the Mission Trip gets canceled for some reason you should enter a reason here.
- Related Files - Like all other modules and sections in Argenta, you can also add an unlimited number of related files to this payment. Make sure to save your changes first before adding related files. If you would like to add any related files to this donation you can do so here. This could be a copy of the donation, check, etc. Simply click the "Browse" button to search for and select a file from your computer or drag and drop the file into the "Drag & Drop File Box".
- Notes - If you would like to add any notes to the donation you do so in the Notes section. To add a note, click the "Add Note" button. This will open the "Add A New Note" screen where you can type a note. Click the "Save & Add This Note" button to save the note and be returned to your donation workspace.
This tab controls the record permissions for the donation.
View Only Access:
Sometimes you want users to be able to view a record but block them from modifying that record. Individual records can be set to View Only so only master admins and users who are listed here can edit them. To grant users permission to modify this record simply add them here. Select a user from the Add User box (start typing the user's name) then click the Add button to add the user to the view only access permissions.
Locked Record Access:
Individual records can be locked so only master admins and users who are listed here can view or edit them. To grant users permissions for this record simply add them here. Select a user from the Add User box (start typing the user's name), then click the Add button to add a user to the locked record access permissions.