Knowledge Base Article
Selling Your Own Products in Argenta
If your organization makes or manufactures something and sells it, Argenta can track both sides: the inventory you produce and the money customers pay you. This article walks the whole chain, from setting yourself up as a vendor to seeing the finished sale in your books.
None of this is a requirement. You can add inventory whenever you like and sell it later. Doing the steps in this order simply keeps the accounting tidy.
What you need first
- Your organization entered as a constituent. Everything else hangs off that record. If it is not there yet, see Add Constituent - Individual.
- Your organization designated as a vendor. Argenta stocks inventory through product orders, and every order needs a vendor. When you make the product, that vendor is you.
- Four accounts in your chart of accounts, if you use General Financials. Skip this if you do not post to the general journal.
Step 1: Make your organization a vendor
- Choose Products & Inventory > Product Vendors.
- Click Add New. This opens the Designate A Constituent As A Vendor screen.
- Start typing your organization's name in the constituent box and pick it. If it is not there, use the add icon in that box to create it without leaving the page.
- Choose a Vendor Type. Wholesaler works well for an organization that makes what it sells.
- Click Add Vendor & Enter Details.
Step 2: Create the accounts you need
Argenta uses double entry nonprofit accounting, so a product you make and sell touches four accounts. This is a guide based on common practice, not a rule. Set your books up the way your accountant prefers.
Choose General Financials > Chart of Accounts and click Add New for each one. Argenta creates the account and opens it so you can fill in the details. Account Status, Account Number, and Account Name are required on every account.
- An asset account for your inventory. Account Type Asset, Account Detail Type Inventory, a number starting with 1, and Needs Account Register set to Yes. One inventory account is plenty. Argenta already tracks quantities per product, so you do not need an account per product.
- An asset account for the money you collect, either a bank account or accounts receivable. This one also needs Needs Account Register set to Yes.
- An income account for product revenue. Account Type Income, Account Detail Type Sale of Product Revenue, a number starting with 4, register set to No.
- An expense account for what the product costs you to make. Account Type Expense, Account Detail Type Cost of Goods Sold, a number starting with 5 through 9, register set to No.
If a detail type you want is not in the list, use Add Account Detail Type to create it.
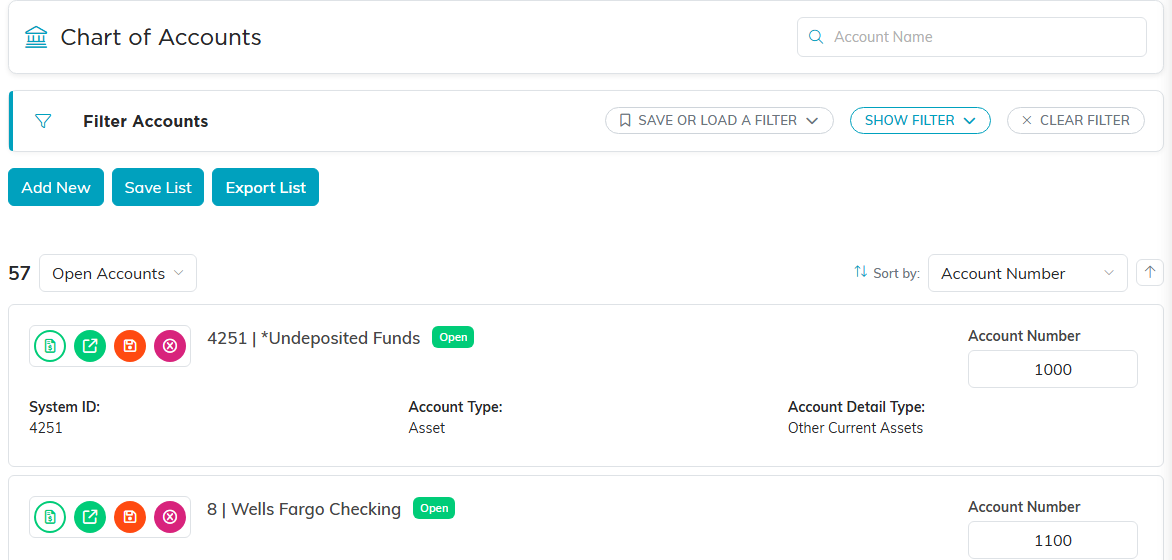
Your chart of accounts. The accounts you set up here are what the sale will land in later.
Step 3: Add the product
- Choose Products & Inventory > Products and click Add New. A short form opens asking for the Product Name. Enter it and click Add & Enter Details, and Argenta creates the product and opens it. Cancel & Exit leaves nothing behind.
- Set the Vendor to your organization.
- Turn on Product Is for Resale. This is what makes the product sellable, and it makes Your Retail Price required.
- Turn on Track In Inventory for anything physical that you stock. This is the switch that makes Argenta check your on-hand quantity when you sell one, so it can stop you from overselling.
- Fill in Vendor Cost (what it costs you to make one), Your Retail Price (what the customer pays), and Unit of Measure. All three are required.
- Add anything else you track: Product Group, Product Type, Product Category, Serial Number, Par Level, and a description.
- Click Save All Changes & Continue.
Argenta calculates Profit Margin for you from the cost and the price. For more on the product record itself, see Add Products.
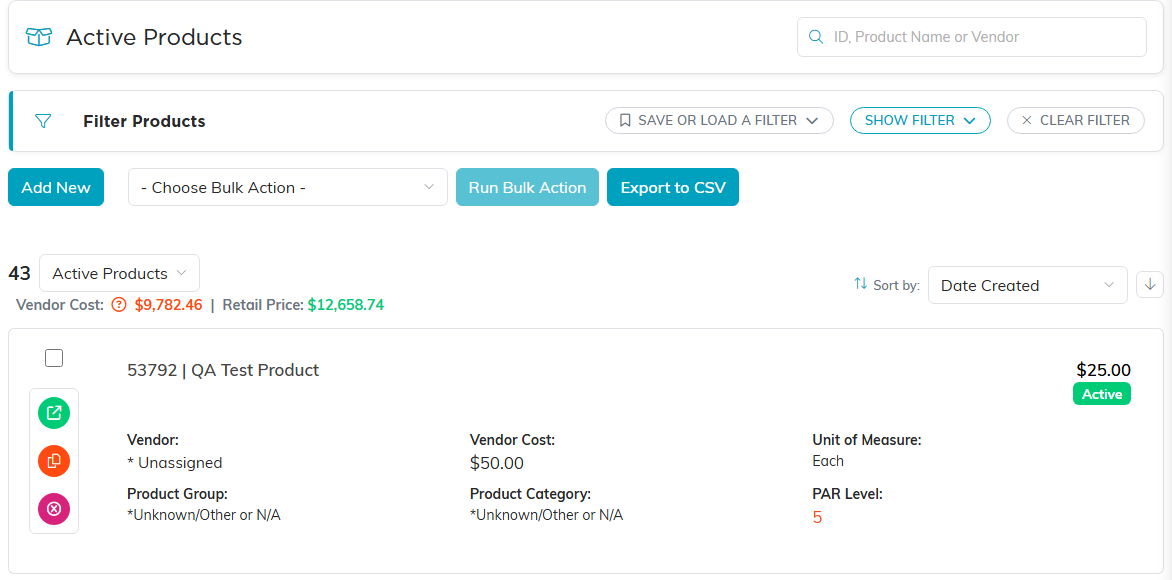
The products list totals your vendor cost against your retail price, so you can see the margin across everything at once.
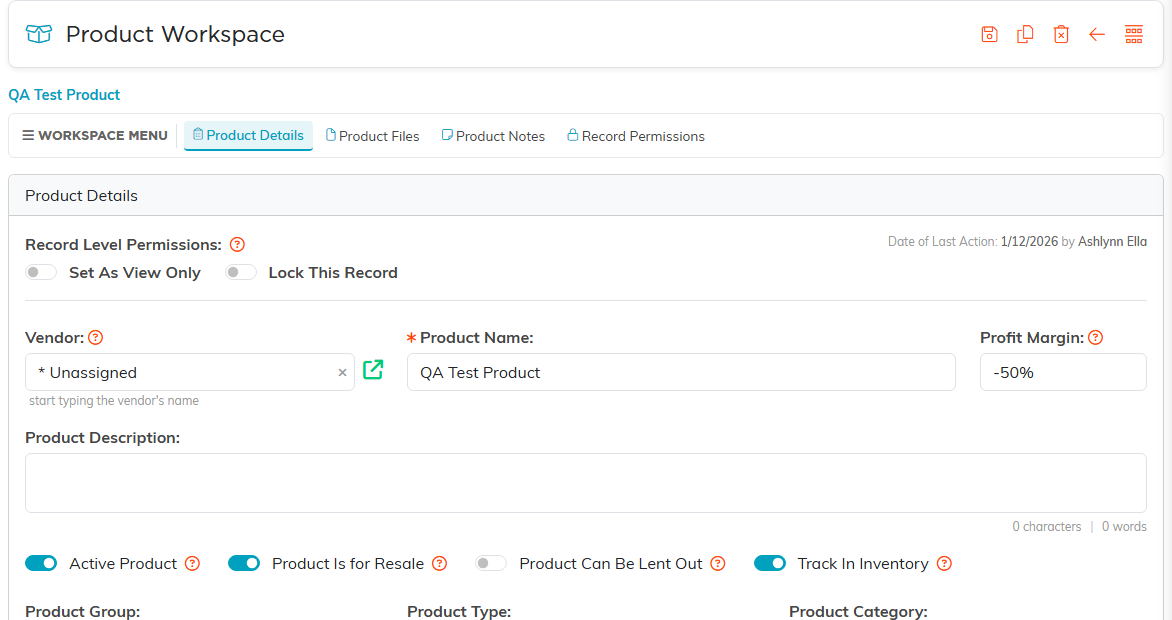
Product Is for Resale and Track In Inventory are the two switches that decide whether a product can be sold and counted.
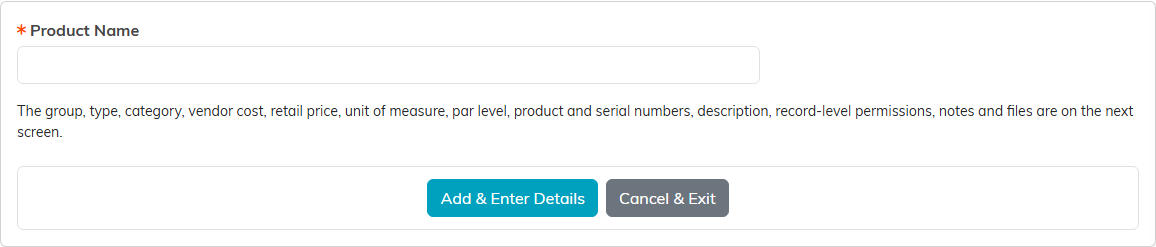
Only the product name lives here. Nothing is saved until Add & Enter Details.
Step 4: Put your product into inventory
Inventory arrives through product orders. You are ordering from yourself here, which feels odd, but it is what puts the quantity on the shelf and the cost in your books.
- Choose Products & Inventory > Product Orders and click Add New to open Add A New Order.
- In the Order Header, pick your organization as the Vendor and set the Order Date. Both are required.
- Choose a Product, enter the Quantity you are adding, and click Add Item. Item Cost and UOM fill in from the product record. Repeat for each product.
- Click Complete Order. The order opens in its workspace with a status of Unfulfilled.
Nothing has reached your inventory yet. Fulfilling the order is what does that:
- In the Fulfill Items In This Order To Add Them To Inventory section, click Fulfill Entire Order. The quantities go into your product inventory and the order status becomes Fulfilled.
- Back in Order Details, check the dates. You will usually leave Payment Method and Check / PO Number empty, since you are not paying an outside vendor.
- To post the cost to your books, turn on Add Order To The General Journal and fill in the three required fields: Fund, Asset Account Used for Payment (your inventory asset account), and Account (Chart of Accounts) (your cost of goods sold expense account).
- Click Save All Changes & Exit.
More detail on orders is in Add Product Order and How to Process Product Orders.
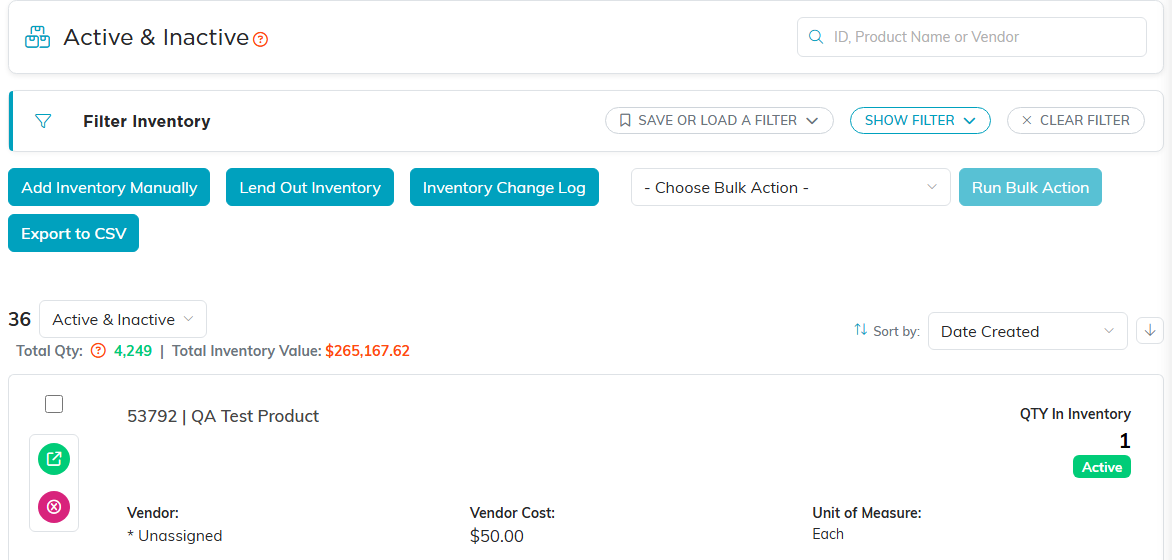
Inventory is counted separately from the product record. This page is where the quantity lives.
Step 5: Sell the product on an invoice
- Choose General Financials > Invoices/Receivables and click Add New. Argenta creates the invoice and opens its workspace.
- Set Invoice For to your customer. It is required, and you can add a new constituent from that box if the buyer is new to you.
- Set the Invoice Date and Due Date. Both are required. For a cash-and-carry sale, both are the date of the sale.
- In the Invoice Items section, click Add A Product. Pick the Product, check the Invoice Price for Item, enter the QTY, and click Add Product To Invoice. Repeat for each product the customer is buying.
- Click Save All Changes.
The price comes from Your Retail Price on the product record. Changing it here changes it on this invoice only. To change it everywhere, edit the product. Use Add An Item instead of Add A Product for a line that is not a catalog product, like a delivery charge. Fees, discounts, and taxes have their own boxes above the invoice total.
Adding the product to the invoice is what takes it off your shelf. For any product with Track In Inventory turned on, Argenta subtracts the quantity from your on-hand count as soon as you add the line, and it will not let you sell more than you have. Try it and you get a message telling you exactly how many are available, so you can lower the quantity or add stock first. Remove the line later, or delete the invoice, and the quantity goes back. Products that are not tracked in inventory, like a service or a session, are added without any stock check.
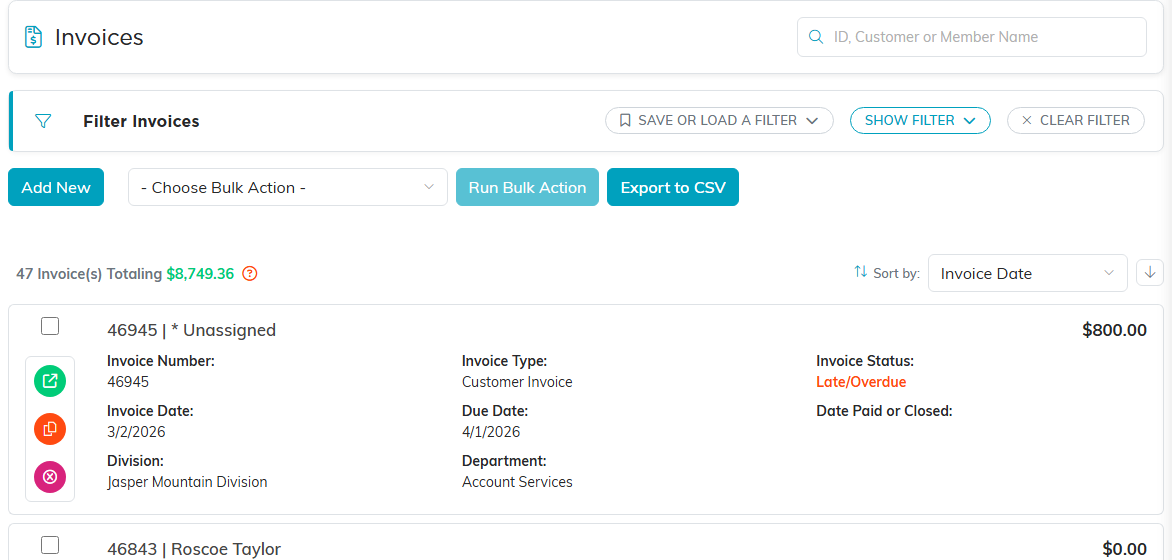
Invoice status tells you what is still owed. Late or overdue shows in red.
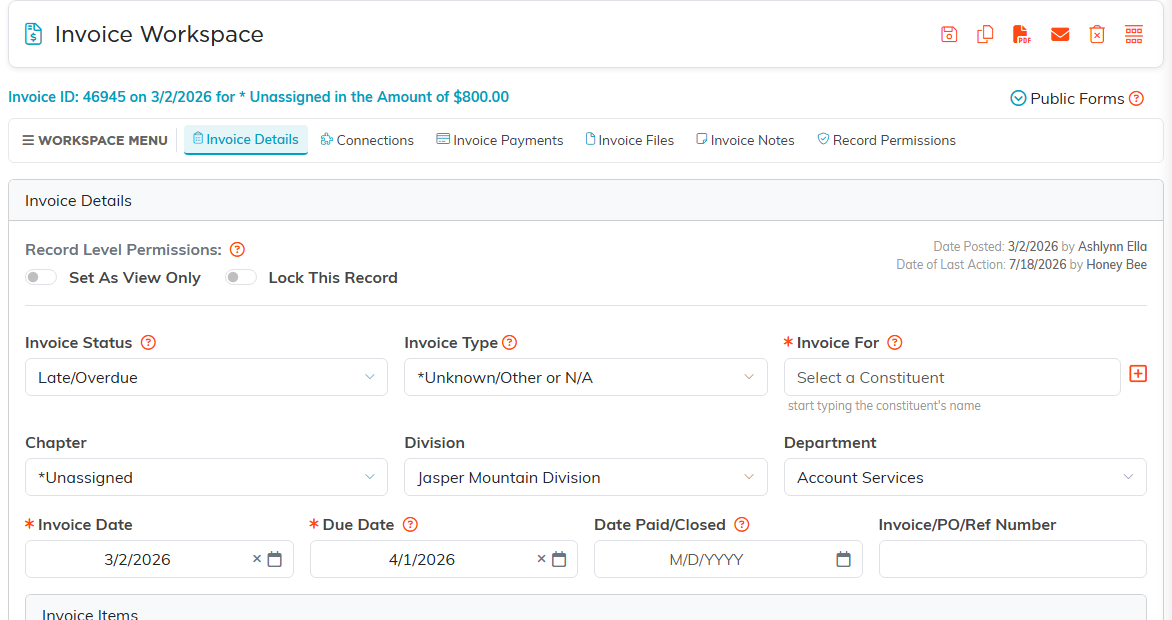
The invoice workspace. The line you add here is what pulls the product and its price onto the sale.
Step 6: Record the payment
Open the Payments tab of the invoice and click Add A Payment. Argenta will stop you if the invoice has no items or no constituent yet, because there would be nothing to pay.
The payment opens in its own workspace. Fill in:
- Payment Date, Payment Amount, and Paid by Constituent. All three are required. The date defaults to today and the amount starts at zero, so set both.
- Payment Method and Check #/Reference # for how the customer paid.
- To post the money to your books, turn on Add To General Journal and fill in Fund, Deposit / Bank Account Used (where the money lands), and Account (Chart of Accounts) (your product revenue income account).
Click Save All Changes & Continue. Once the payment is on the general journal, a link appears that takes you straight to the matching accounting transaction.
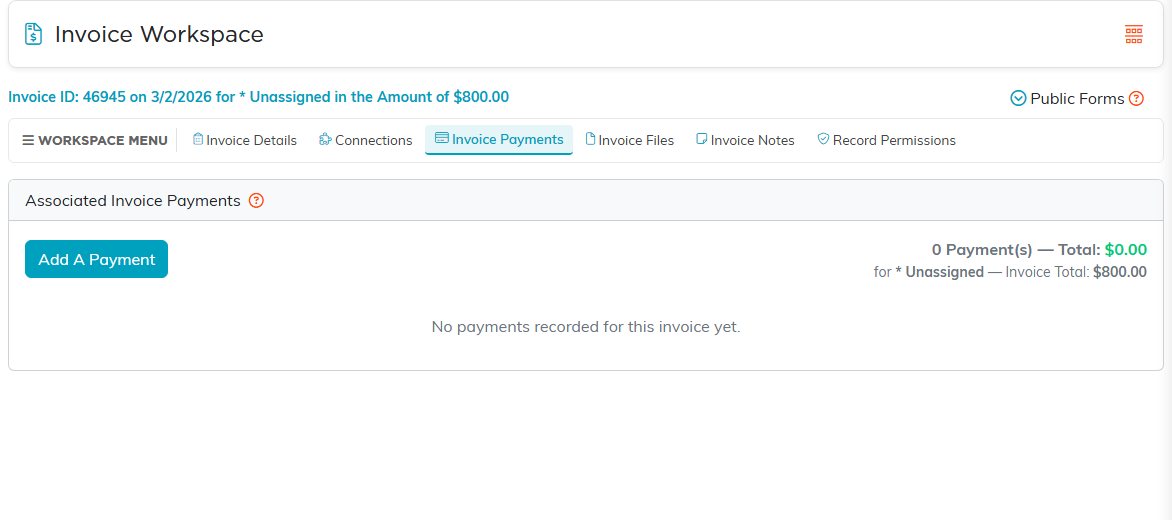
Payments hang off the invoice. Until one is recorded here the invoice still reads as owed.
Step 7: Close the invoice
Recording a payment does not close the invoice for you. Go back to Invoice Details, set Invoice Status to Paid/Closed, fill in Date Paid/Closed, and save. The other statuses available are New/Pending, Sent/Outstanding, Late/Overdue, In Dispute, Unpaid/Closed, and Refunded/Closed.
Seeing the sale in your books
Choose General Financials > General Journal to see the entries. One sale of your own product produces two transactions, the cost of the goods when you fulfilled the order and the revenue when you took the payment. If you did both on the same day, all four entries sit together on that date and the double entry balances across your inventory, cash, revenue, and cost of goods sold accounts.
You can also open the payment record and use its link to the corresponding accounting transaction.
Other ways you might sell a product
Invoices are the right tool for a direct sale to a customer. Two other paths record their own sales:
- Fundraising > Campaign Sales List holds purchases people make through a campaign form.
- Event Management > Event Ticket Sales holds ticket purchases for your events.
Both are recorded separately from your product catalog, so neither one subtracts from a product's on-hand quantity the way an invoice line does. If you sell stock through a campaign form or an event, adjust your inventory yourself. See How to Track Inventory Changes.
