Knowledge Base Article
Overview, Working with Mission Trip Types
This article covers the Mission Trip Type Workspace: how to open, edit, and delete your mission trip types. Mission Trip Types set the default fund and fees for the trips grouped under them.
Open a mission trip type
From the left menu, go to Mission Trips > Mission Trip Types. Find the type you want with the search box or the status filter, then click the green open icon on its row to open the Mission Trip Type Workspace.

The search box sits top right, the status filter under it.

The green icon opens the Mission Trip Type Workspace.
Edit a mission trip type
On the Trip Type Details tab you can update:
- Status - Active or Inactive.
- Mission Trip Type (required) - the name of the type.
- Associated Fund (required) - the default fund for trips of this type; start typing to search, then select it.
- GL Unearned Revenue and GL Earned Revenue - the GL accounts where this type's revenue posts.
Click Save All Changes & Continue to save and keep working, or Save All Changes & Exit to save and return to the Mission Trip Types list.
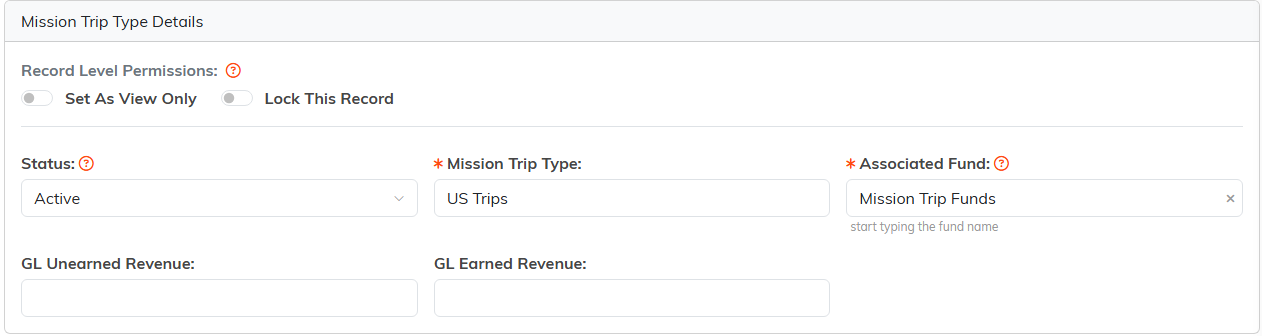
The four things you can change on Trip Type Details.

Continue keeps you here, Exit sends you back to the list.
On the Trip Type Default Fees tab you can edit each fee's Fee Type, Fee Amount, and Active setting, then click the save icon on that row.
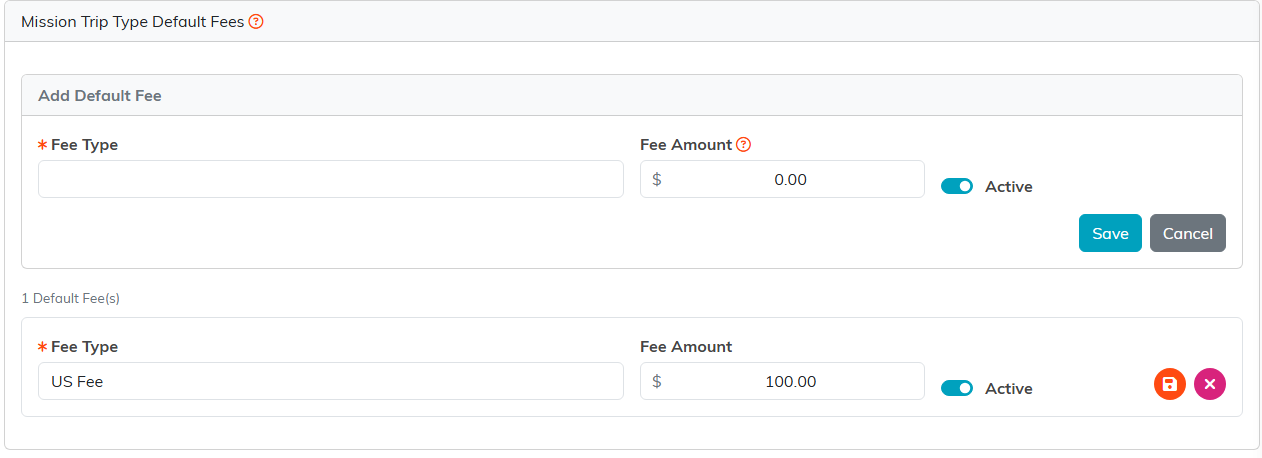
Each fee row carries its own save icon.
Delete a mission trip type
Open the type and use the delete icon in the workspace title bar (or the delete icon on the list row), then confirm. Two rules protect your data:
- A mission trip type can be deleted only if no mission trip has ever used it.
- A default fee can be deleted only if no mission trip has ever used it.

The delete icon sits in the workspace title bar.
Deletion is permanent and can't be undone, so delete carefully.
