Knowledge Base Article
Overview, Working with Mission Trip Accounts
This article walks through the Mission Trip Account Workspace: how to open an account, what's on each tab, how to edit it, and the rules around deleting. A Mission Trip Account is an organization, household, or individual that takes part in your mission trips.
Open an account
From the left menu, go to Mission Trips > Mission Trip Accounts. Find the account with the search box or filters, then click the green open icon on its row to open the Mission Trip Account Workspace.

The search box and the filter bar sit above the accounts.

The green icon opens the Mission Trip Account Workspace.
The account workspace tabs
The workspace opens on the Account Details tab and includes these sections:
- Account Details - the account's constituent card plus its editable fields.
- Enrollments - the account's mission trip enrollments.
- Payments - every payment the account has made across its trips.
- Reserved Credits - credits issued to the account.
- Follow-Up, Contact Log, and Email Log - your history with the account (Email Log is available for GMT teams).
- Account Files and Account Notes - files and notes kept on the account.
- Record Permissions - who can view or edit this account.

Every tab in the account workspace.
Edit the account
On the Account Details tab you'll see the account's constituent card (click Open Full Constituent Record for the complete constituent) along with the editable fields: Account Contact, Account Manager, Account Type, Account Category, Acquisition Source, and Associated Campaign. Update what you need, then click Save All Changes & Continue or Save All Changes & Exit.
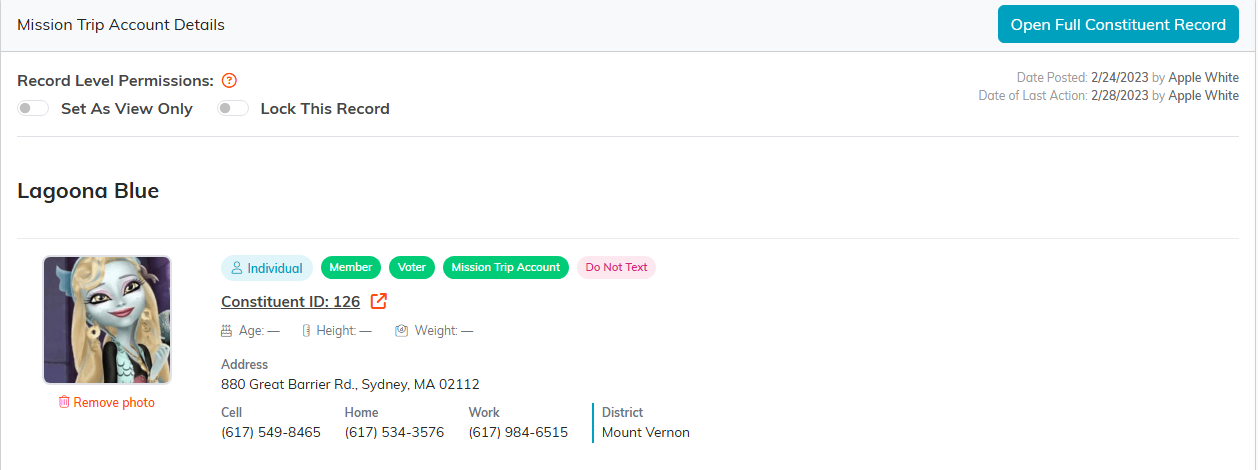
Open Full Constituent Record sits at the top right of the card.

The six fields you can change on the account.

Save when you are done.
You can add files, contact log entries, and notes from their tabs. For step-by-step help, see Add Related Files, Add Contact to Contact Log, and Add A Note.
Enrollments, Payments, and Reserved Credits
- On the Enrollments tab you can change an enrollment's Status or Number Enrolled right in the list, and Argenta recalculates the amounts due. Click the open icon to work in the full Enrollment Workspace.
- On the Payments tab, click a payment's open icon to open its details, where you can also post it to the General Journal.
- On the Reserved Credits tab, click Add New to issue a credit, or open one to view it. For the credit fields, see Add A Mission Trip Reserved Credit.
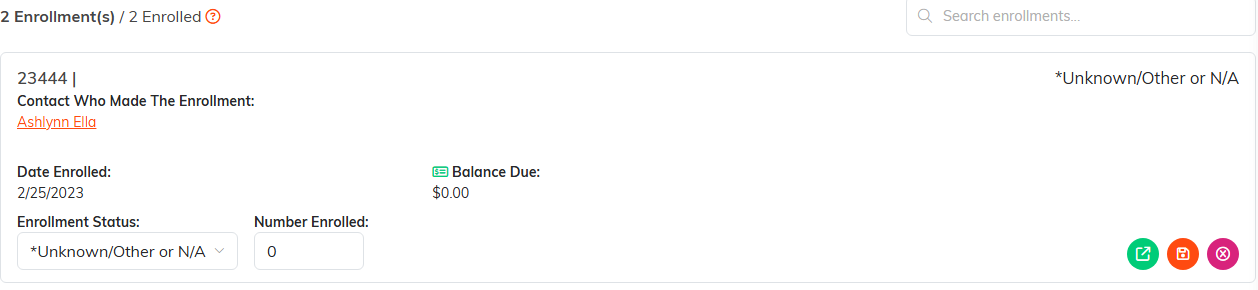
Status and Number Enrolled edit right on the row.
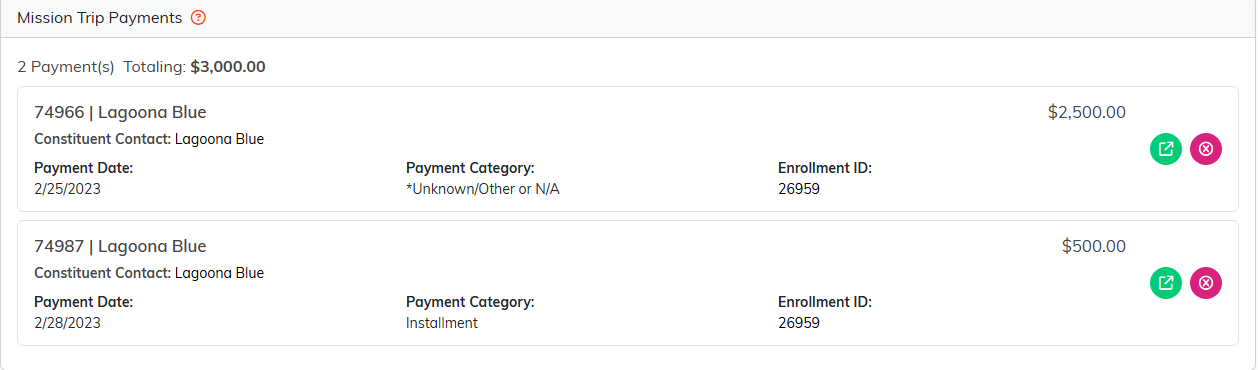
The Payments tab covers every trip the account has paid toward.
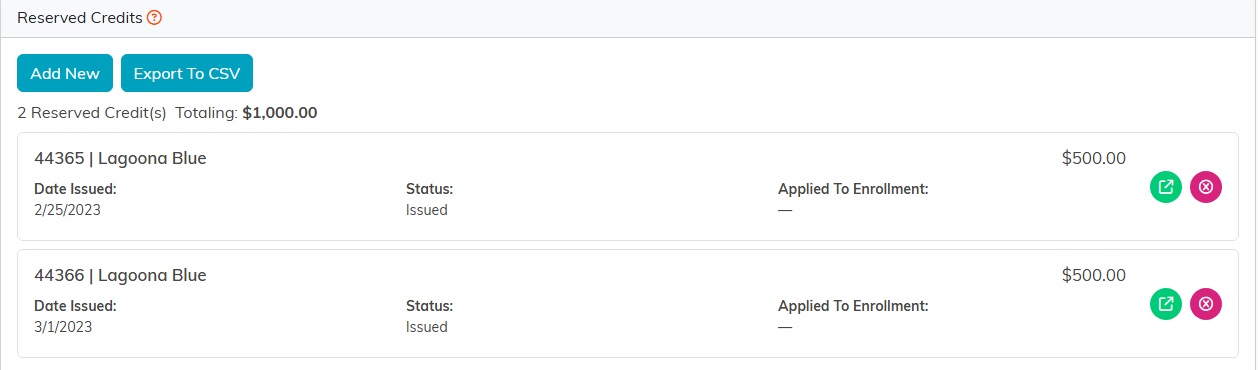
Add New on this tab issues a credit to the account.
Deleting records
Wherever you see a delete icon you can remove that record, and you'll be asked to confirm. A few rules protect your data:
- A mission trip account can be deleted only if it has never been enrolled in a mission trip.
- Deleting an enrollment also removes its payments, credits, adjustments, notes, files, and history, so only do it if you're sure you don't need any of that.
- Be careful deleting payments, especially credit card payments processed by Stripe.
- A reserved credit can be deleted only if it hasn't been applied yet. If it has, remove it from the enrollment first (that resets it to Issued), then delete it.

The delete icon in the workspace title bar.
Deletion is permanent and can't be undone.
