Knowledge Base Article
How to Build Campaign Sales Forms
A fundraising campaign has its own public form, designed from the campaign record. It is where supporters buy, give or fundraise on your behalf.
Opening the Designer
- Go to Fundraising > Fundraising Campaigns.
- Open the campaign.
- In the Workspace Menu, choose Public Form Design.
The Public Campaign Form is also listed directly under Fundraising and under Our Public Interfaces, and campaign sales are listed at Campaign Sales List.
The Sections of the Designer
The page is built from collapsible sections, so you can close the parts you are not working on. Some open on their own when the page loads:
- Banner Image (for both the donation and sales forms): the picture across the top of the form
- Form Settings: the form title, the colors, and the switches that decide what the public sees
- Fundraising Leaderboard: the standings shown on the campaign
- Peer Fundraising: supporters raising money on your behalf
- Form Content (for both the donation and sales forms): the wording on the form
Above those sections sits the Public Sales Form (On or Off) switch. The sales form is not public until that one is on.
Showing a Picture Beside Each Item
The sales form can show a picture next to every item you are selling. Pictures are optional, and setting them up takes two steps in two different places.
- In the campaign's Workspace Menu, go to Sale Item Settings. Each item has a row of round buttons in its top right corner. Click the picture button, Item Image, and choose the picture for that item. Repeat for each item you want to show.
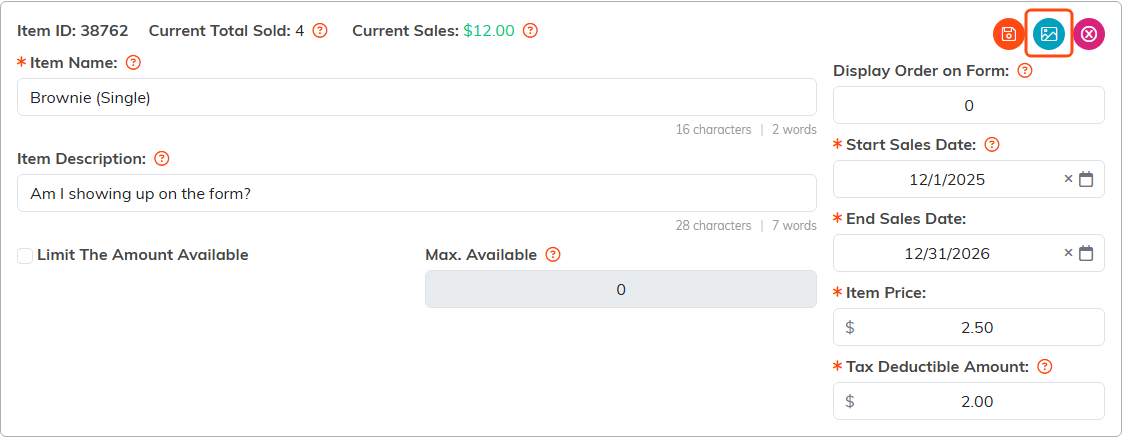
- Go back to Public Form Design, open Form Settings, and turn on Show Item Images on the Public Sales Form. Click Save Settings.
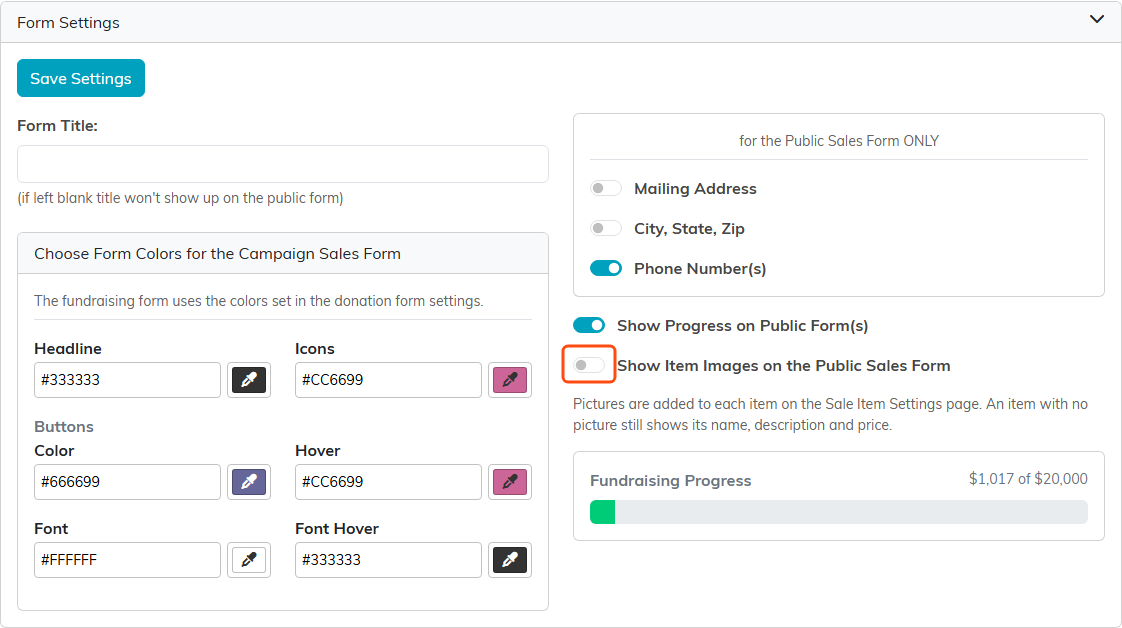
The switch stays off until you turn it on, so a campaign you built earlier looks exactly as it did. An item with no picture still shows its name, description, and price, so you can give pictures to some items and not others.
If you start a new campaign with Copy & Add New, the Show Item Images on the Public Sales Form setting comes across with the rest of the form design. The sale items themselves do not come across, so add the items and choose their pictures on the new campaign before you share it.
If you add pictures while the switch is still off, the Sale Item Settings page tells you so and links you straight to the page that carries the switch.
Sharing the Form
A campaign has TWO public forms and therefore two separate share cards on this page: Share The Public Donation Form for giving, and Share The Public Sales Form for selling items. Each card carries its own Public Link with a Copy button and its own QR code, downloadable as a PNG or an SVG. They are different links, so check which one you are sending.
Leaving the Page
Save All Changes keeps your work. Exit Workspace returns you to the campaign record.
Best Practices
- Set the banner and wording before you share the link anywhere
- Only turn the leaderboard on if you want the standings public. It changes how people behave
- Check the form on a phone, since that is where most people will open it
