Knowledge Base Article
How to Add a New Program
Follow these steps to create a new program in Argenta.
Step-by-Step Instructions
- Navigate to Programs > Program List
- Click the Add A New Program button. Argenta asks for the name first, on a short screen of its own
- Type the Program Name and click Add & Enter Details. The program is created at that point and its Program Details page opens. Cancel & Exit on this screen creates nothing at all
- Fill in the program details:
- Program Name (required): Enter a descriptive name
- Program Status: Select the current status (e.g., New, In Process)
- Program Type: Choose the type that best describes the program
- Program Category: Select an optional category for additional classification
- Assigned To (Team Member): Select a team member responsible for the program
- Program Start Date: When the program begins
- Program End Date: When the program ends (leave blank for ongoing programs)
- Budget: Enter the program budget amount
- Is Program Currently Funded?: Select Yes or No
- Program Description: Provide details about the program purpose and activities
- If your organization uses organizational units, select Chapter, Division and Department. District and Precinct appear for political organizations
- Click Save All Changes to save and keep editing, or Save All & Exit Record to save and return to the list. Cancel & Exit leaves without saving your latest edits

Step 2. Add A New Program sits above the program list.
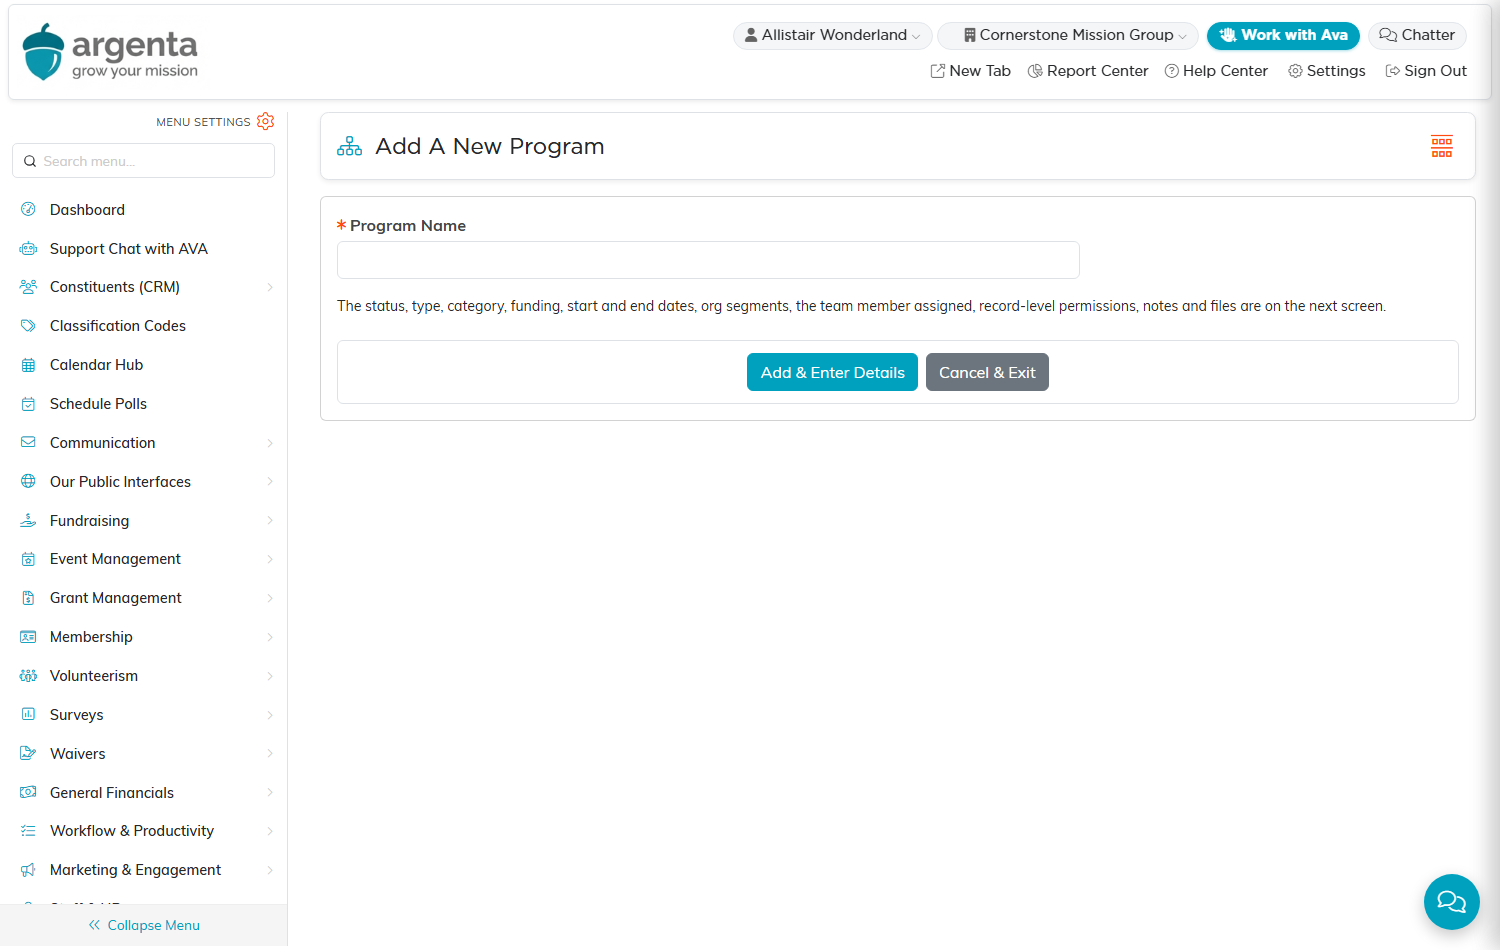
Step 3. Argenta asks for the name first. Nothing is created until you click Add & Enter Details.
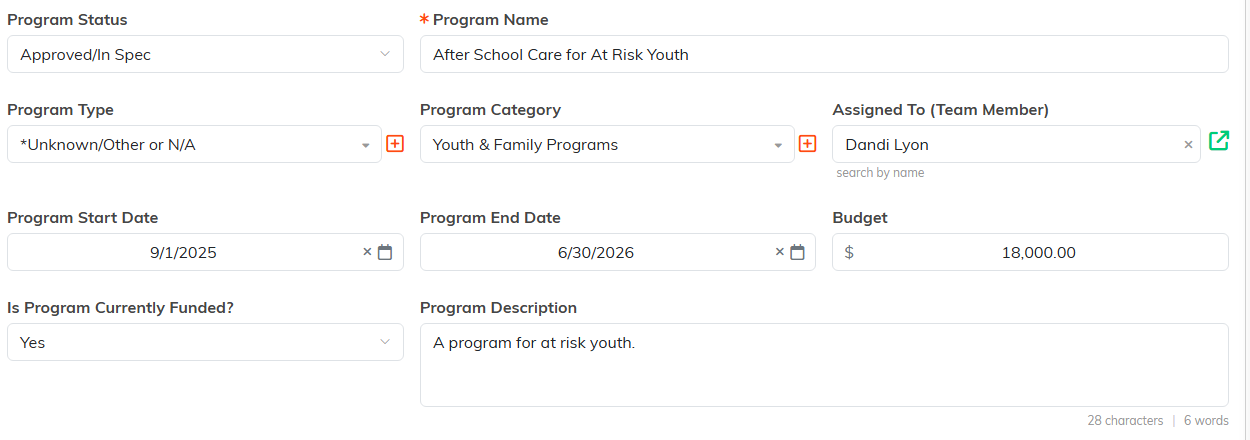
Step 4. The Program Details page, where you fill the record in. Required fields carry an orange asterisk.

Step 5. Chapter, Division and Department, when your organization uses them.

Step 6. The button row at the bottom of Program Details.
Tips
- Use clear, descriptive program names for easy searching
- Set a realistic budget early, you can adjust it later
- Assign a team member so someone is accountable for the program
- Nothing is saved until you click Add & Enter Details, so changing your mind on the name screen leaves nothing behind to tidy up
