Knowledge Base Article
How to Create a Calendar in Calendar Hub
Calendar Hub holds your appointment calendars, both the private one only you work from and shared ones your team uses. Creating one takes a name and a single switch, so it is worth making a separate calendar for anything you want to book time against.
Create a calendar
- Click Calendar Hub in the left menu.
- Click Add New Calendar in the row of buttons across the top. The Add A New Calendar box opens.
- Set the two fields:
- Personal/Private Calendar. On by default. Leave it on for a calendar you work from yourself. Turn it off to create one your team shares.
- Calendar Name. Required. Use a name a colleague would recognize in a list, something like "Donor Meetings" rather than "Calendar 2".
- Click Add Calendar. Argenta creates the calendar and opens it for you.
That is everything the create box asks for. The rest of the setup happens on Calendar Info.

Add New Calendar sits in the row of buttons across the top.
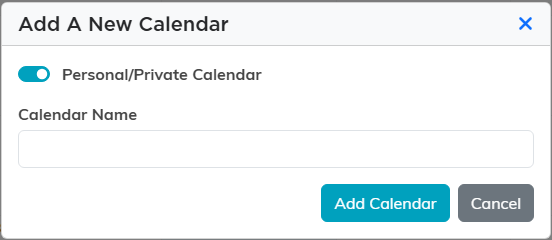
Two fields, then Add Calendar.
Fill in the details on Calendar Info
On a personal calendar, a Workspace Menu appears just under the buttons with Calendar View, Calendar Info, Default Schedule, Availability, and Notification Design.
- Click Calendar Info.
- Fill in the details:
- Calendar Name. Rename the calendar here any time.
- Location or Online Meeting Link. Choose Online Appointment or In-Person, then type the meeting link or the physical address in the box underneath. This becomes the default for appointments booked on this calendar.
- Calendar Description. A short note about what the calendar is for.
- Click Save All Changes. Calendar Name is required, so Argenta will stop you if you clear it.

The Workspace Menu sits just under the buttons.

Pick Online Appointment or In-Person, then fill in the box underneath.

Save All Changes sits at the top right of the panel.
Move between calendars
The dropdown at the top right of every Calendar Hub page lists the calendars you can open. Pick one and Argenta takes you straight to it.
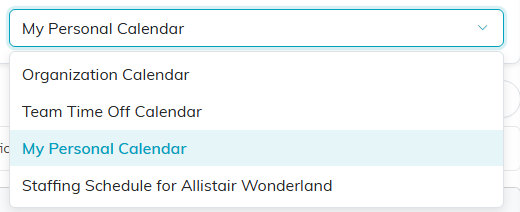
The dropdown at the top right switches calendars.
What else is in the Workspace Menu
- Calendar View. The calendar itself. New Appointment drops an appointment onto it, and Export To PDF saves what you are looking at.
- Default Schedule and Availability. The hours you are open for appointments, and the days or times you are not. See How to Set Up Calendar Availability for Appointments.
- Notification Design. The default appointment notification email that goes out for this calendar.

New Appointment and Export To PDF live on Calendar View.
Delete a calendar
Open the calendar, click Delete Calendar, and confirm. Every appointment on that calendar is removed with it, so look through it first. Argenta's built-in calendars cannot be deleted, which is why the button does not appear on all of them.

Delete Calendar only shows on a calendar you created.
To keep a calendar in step with Google, see How To Use The Google API with Argenta Calendars.
