Knowledge Base Article
How to Set Up Calendar Availability for Appointments
Availability is what turns a calendar into something people can book. It comes in two parts: a Default Schedule that sets your normal weekly hours, and an Availability page where you block the days and times you are not free. Set the weekly hours first, then block the exceptions as they come up.
Set your weekly hours on Default Schedule
- Click Calendar Hub in the left menu and open your calendar.
- Click Default Schedule in the Workspace Menu.
- Click Add Defaults. A row opens at the top of the table, already filled in with Monday, 9:00 AM, and 5:00 PM.
- Set the row:
- Day. Sunday through Saturday.
- Start time and End time. The window you are open for appointments that day. Start has to be before End.
- Mark as unavailable. Check this instead of entering times to say you never take appointments on that day.
- Click the save icon on the right of the row. The cancel icon next to it drops the row without saving.
- Repeat for each day you want to open. Saved rows show as Available or Unavailable in the table.
To remove a day, click the pink X at the end of its row. Argenta clears the bookable slots it had already worked out for that weekday.

Default Schedule and Availability both sit in the Workspace Menu.

Add Defaults opens a row already filled in. Set it, then click the save icon.
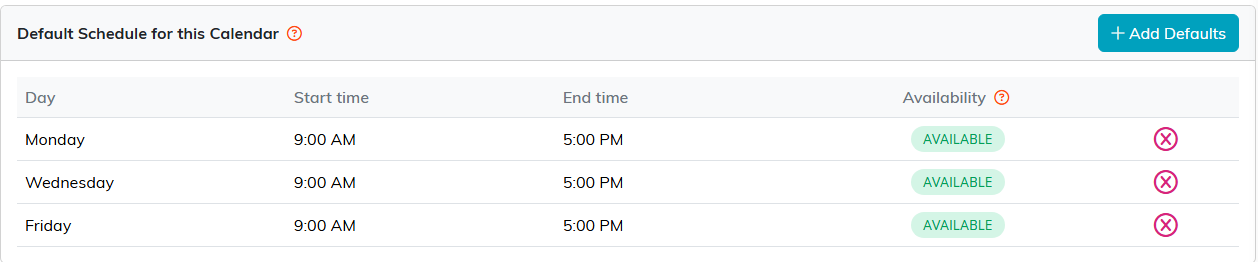
Saved rows read Available or Unavailable. The pink X removes a day.
Block days and times on Availability
Use this for the exceptions: a conference, a holiday, an afternoon you need back. Click Availability in the Workspace Menu.
- In the Add Appointment Blocks To Calendar panel on the left, pick the Date.
- Either set a Start Time and End Time to block part of the day, or switch on Block Entire Day to take the whole day out.
- Click Add Block.
Blocks appear in the list on the right with the date, the time range (or "All day"), and a BLOCKED tag. The count above the list tells you how many custom and fully blocked days the calendar has. Click the pink X on a row to remove a block and put those hours back.
Blocking also puts a placeholder on the calendar itself so the time reads as busy at a glance: a full day shows as BLOCKED DAY, and a time range shows as BUSY.
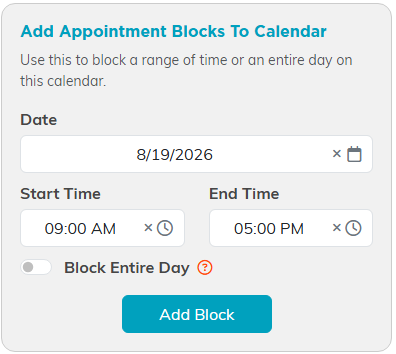
Pick a date, set the times or block the whole day, then click Add Block.

Blocks list on the right with a BLOCKED tag and a pink X to remove them.
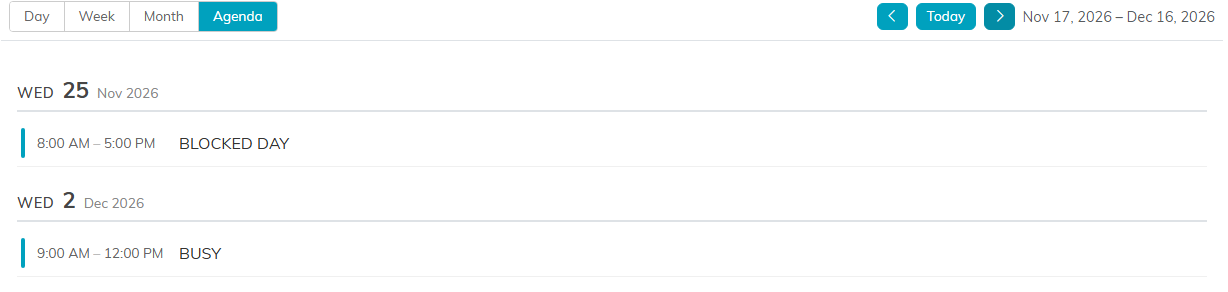
The block also shows on the calendar as BLOCKED DAY or BUSY.
Share your booking link
Once the schedule is set, Argenta works out the open slots and publishes them on a page anyone can use, no login needed.
- On any Calendar Hub page for a personal calendar, click Public Appointments for Calendar at the top right.
- Click Copy Appointment Calendar Link to put the link on your clipboard, or Open Public Appointment Calendar to see the page the way a visitor will.
- Paste the link into an email, your email signature, or your website.
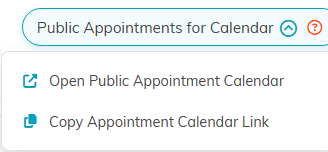
Copy the link, or open the page to see it the way a visitor will.
What the person booking sees
They get a month view with the open dates highlighted. Picking a date lists the times you have free, and picking a time opens a Confirm your time box asking for their name, organization, and email address, with phone and notes optional. They click Schedule and the appointment appears on your calendar.
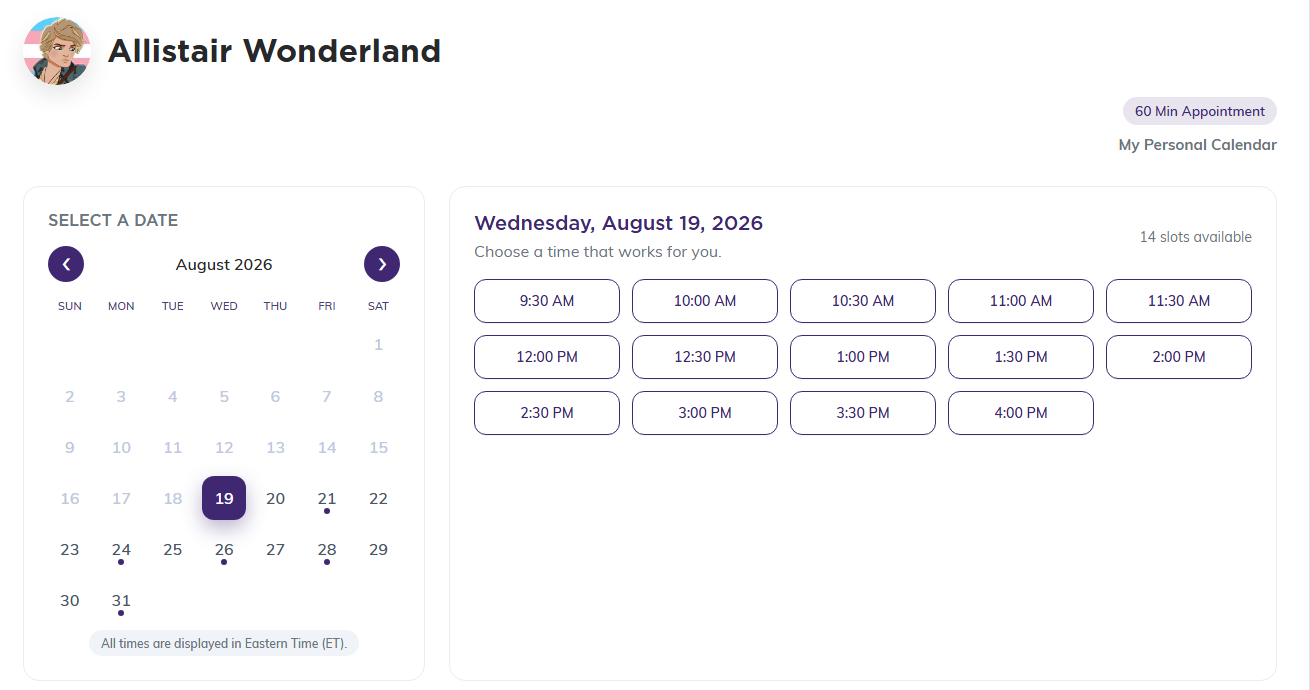
Open dates are highlighted, and picking one lists the free times.
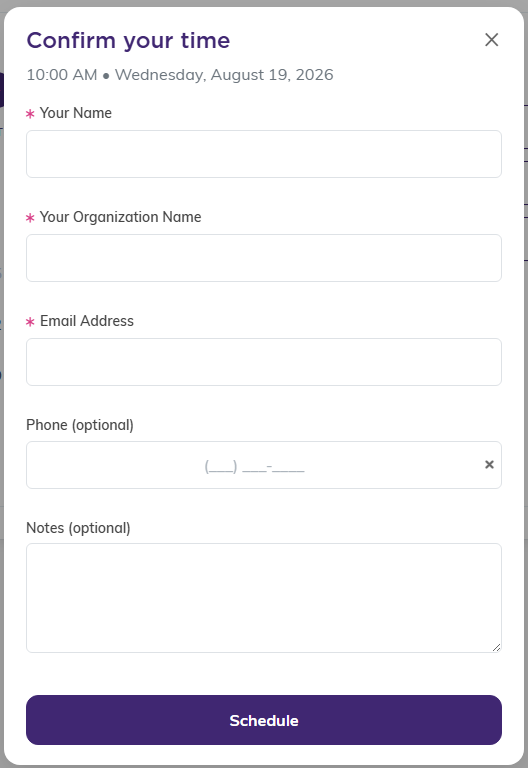
Picking a time opens this box. Schedule puts the appointment on your calendar.
To design the confirmation emails that go out, use Notification Design in the Workspace Menu. To set the calendar up in the first place, see How to Create a Calendar in Calendar Hub.
