Knowledge Base Article
How to Add a Product to the Catalog
Every item you stock, sell, or lend starts as a product record. Add it to the catalog first, then inventory and orders have something to point at.
Add the product
- Go to Products & Inventory > Products and click Add New. A short form opens asking for the Product Name. Enter it and click Add & Enter Details, and Argenta creates the record and opens the Product Workspace on Product Details. Cancel & Exit leaves nothing behind.
- Fill in the required fields, marked with an orange asterisk: Product Name, Vendor Cost (what you pay for it), and Unit of Measure.
- Pick the Vendor you buy it from. Profit Margin works itself out from your cost and price.
- Write a Product Description.
- Set Your Retail Price, which is what you charge. This field only becomes editable once you turn on the Product Is for Resale switch.
- Click Save All Changes & Continue to stay on the record, or Save All Changes & Exit to go back to the list.

Add New asks for the product name, then creates the record and opens the Product Workspace.

Profit Margin works itself out. You cannot type into it.

Your Retail Price only unlocks once Product Is for Resale is on.
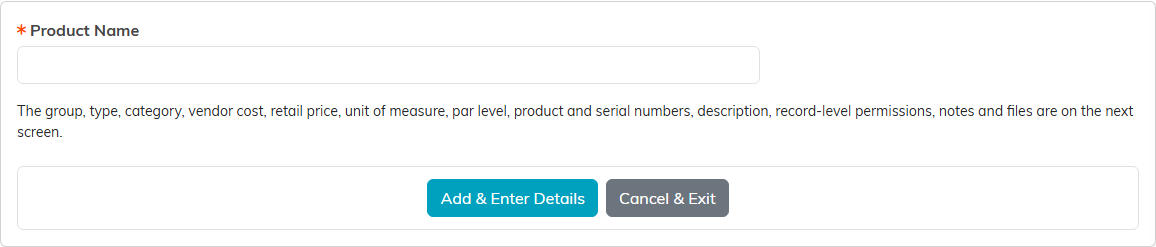
Only the product name lives here. Nothing is saved until Add & Enter Details.
The four switches
These decide how the product behaves everywhere else, so they are worth a moment:
- Active Product keeps it in circulation.
- Product Is for Resale unlocks the retail price. Leave it off for something you buy purely for internal use.
- Product Can Be Lent Out makes it available to the Lend Out Inventory pages.
- Track In Inventory brings it into the inventory count. Without this you have a catalog entry and no stock tracking.

These four decide how the product behaves everywhere else.
Classifying and identifying it
- Product Type, Product Category, and Product Group are how you organize the catalog for filtering and reporting.
- Vendor's Product Number and Serial Number tie your record back to the supplier's.
- Par Level is the stock level you want to keep on hand, which is your cue to reorder.
- Unit of Measure is required, and it is how the product gets counted everywhere else in the system.

Three ways to organize the catalog, all your own lists.

These tie your record back to the supplier's.
Worth knowing
- There is no image upload on a product record. Describe the item in the description instead.
- Quantity on hand is not set here. Stock lives in Product Inventory and is added or removed there.
- Copy & Add New on the product itself, and the orange copy action on the product list, save a lot of typing when you are adding variations of the same item.
- The workspace also holds Product Files, Product Notes, and Record Permissions, where you can set the record view only or lock it.

Copy and Add New saves a lot of typing on variations of the same item.

Files, notes and record permissions are on this bar.
