Knowledge Base Article
How to Process Product Orders
A Product Order in Argenta is an order you place with a vendor to restock, not an order a customer places with you. If you are looking for sales to supporters, that is handled elsewhere.
Raise an order
- Go to Products & Inventory > Product Orders and click Add A New Order.
- In the Order Header, choose the Vendor and the Order Date. Both are required.
- Under Add Items To This Order, pick a Product, check the Item Cost, and enter the Quantity. Product and quantity are required.
- Add as many items as the order needs. The running Order Total updates as you go.
- Save the order, which opens the Order Workspace.
Only products already in your catalog can go on an order, so add anything new under Products first.

Add A New Order opens a blank order.
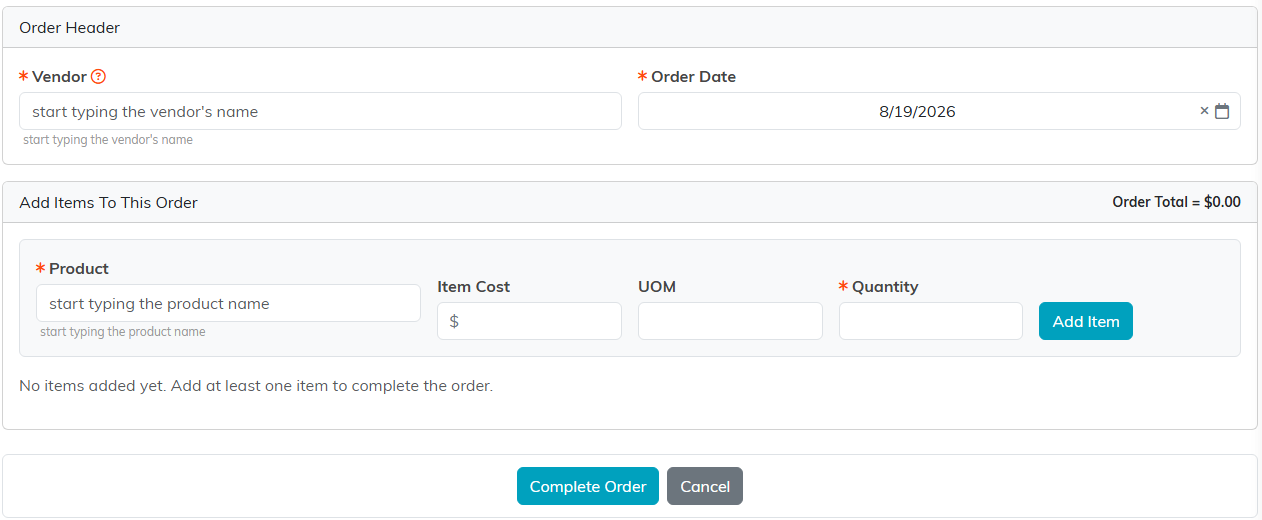
The running Order Total updates as you add lines.
Track it through to arrival
On Order Details you have the fields that carry an order from placed to closed:
- Order Number and the vendor's details for reference.
- Order Status for where it stands.
- Check / PO Number to tie it to your purchase order or payment.
- Date Fulfilled for when the goods arrived.
- Date Paid and Payment Method for the money side.
- Order Total, with each line's item cost and unit of measure.
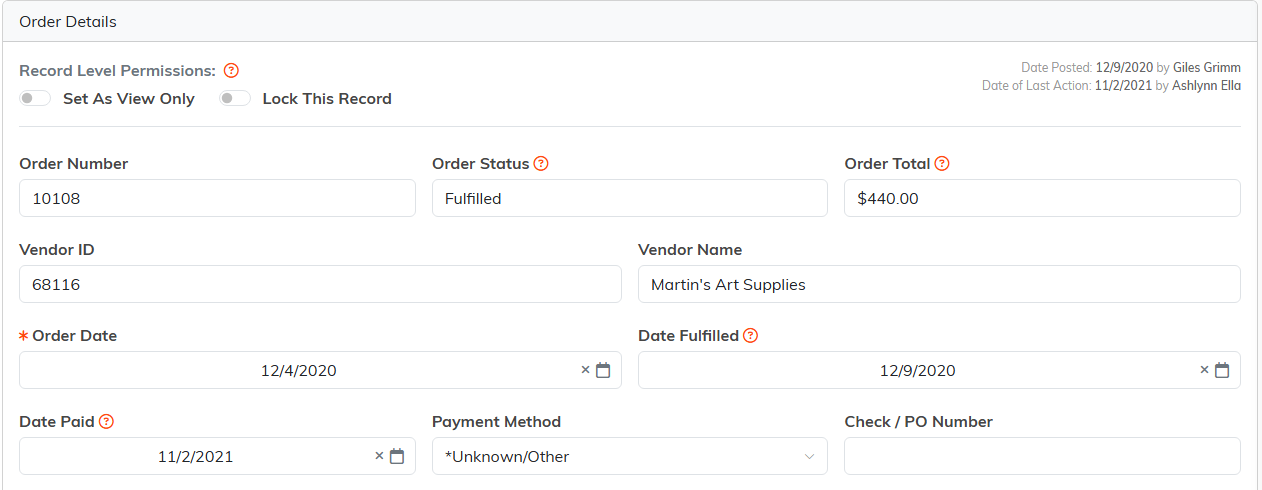
Order Status and Date Fulfilled carry the order from placed to closed.

Check or PO Number ties the order to your own paperwork.
Receive the goods into stock
This is the step that connects an order to your inventory. On the Order Details page, under Fulfill Items In This Order To Add Them To Inventory:
- Click Fulfill Entire Order when the whole delivery has arrived. The quantities go into Product Inventory for you.
- Fulfill items individually when a delivery comes in split, since each line carries its own fulfilled or unfulfilled status.
- Return Entire Order reverses a fulfilled order if it has to go back to the vendor.
The order shows as Unfulfilled until this is done, and Date Fulfilled only becomes editable once it is. So you do not add received stock by hand: fulfilling the order is what moves it in.
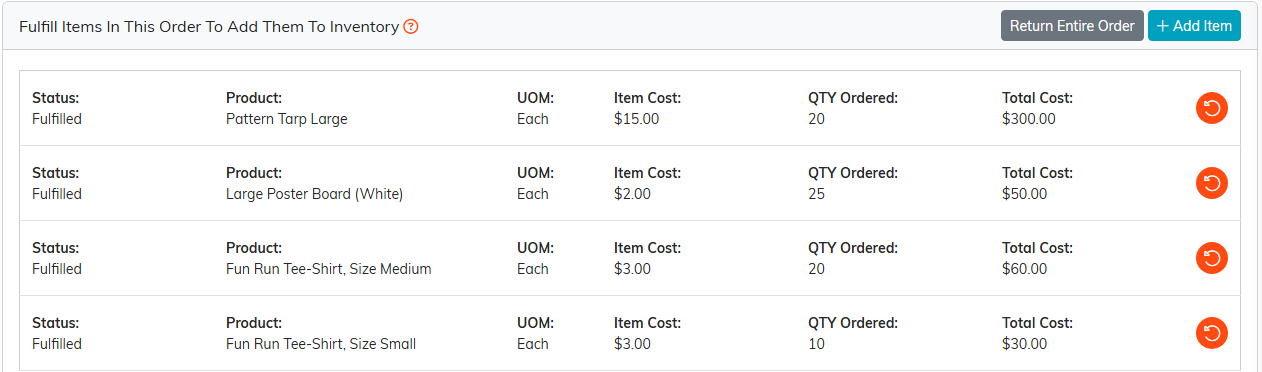
Fulfilling is what moves the goods into Product Inventory.
The rest of the workspace
- Refunds for anything sent back to the vendor.
- Order Files for the invoice or packing slip.
- Order Notes for anything worth remembering about this order.
- Record Permissions to set the order view only or lock it.

Refunds, files, notes and permissions are on this bar.
Worth knowing
- You need the Products Manager or Admin role to add orders. Without it you will see a message saying so.
- Stock that arrives without an order can be entered directly in Product Inventory instead. See Add Product Inventory.
- The order list has its own Export to CSV, which is useful for reconciling vendor spend.

The order list export is what you reconcile vendor spend against.
Related: How to Track Inventory Changes.
