Knowledge Base Article
How do I insert a merge tag into an email template?
To insert a merge tag into your email template:
- Open the Email Template Workspace for the template you want to edit
- Place your cursor in the editor where you want the personalized text to appear
- Click the tags icon in the editor toolbar (it looks like a small tag/label icon)
- A modal window opens showing all available merge tags organized by category: Contact Info, Mailing Address, Organizational Segments, Donations, Membership, and Volunteerism
- Click the tag you want to insert, for example [FirstName]
- The tag is inserted at your cursor position and the modal closes automatically

The tags icon in the editor toolbar.
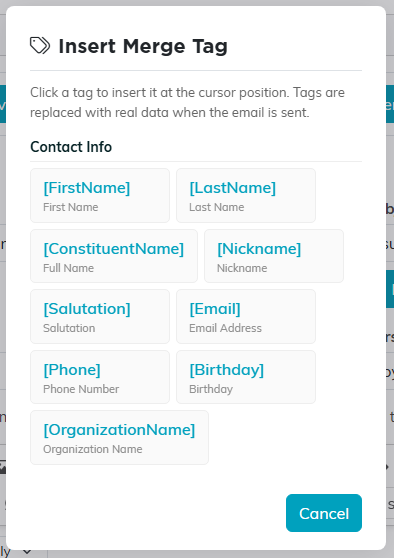
The picker opens on Contact Info. Click a tag to drop it in.
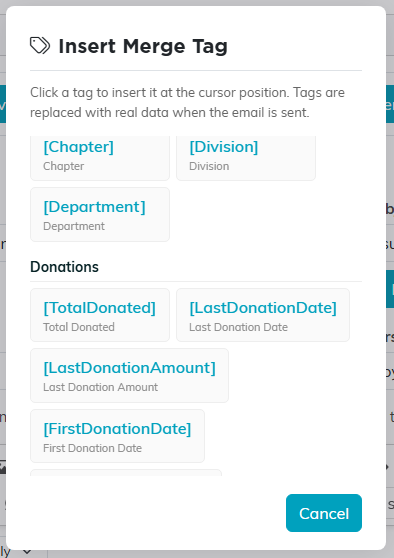
Scroll the picker for the other groups, such as Donations.
Tips:
- You can insert as many tags as you want throughout your email
- Tags work in the Subject line too. Just type the tag directly into the Subject field, for example: Thank you for your gift, [FirstName]!
- You can type tags manually if you prefer. Just use square brackets with the exact tag name, like [LastName] or [TotalDonated]
- Save your template after inserting tags. The tags are stored as-is and replaced only when the email is actually sent
